A distinct variety of slime called “cloud slime” has a fluffy texture akin to kinetic sand. The main component is something named “Instant Snow,” however if you can’t find any, you may use broken Styrofoam or the absorbing powder from the inside of a diaper.
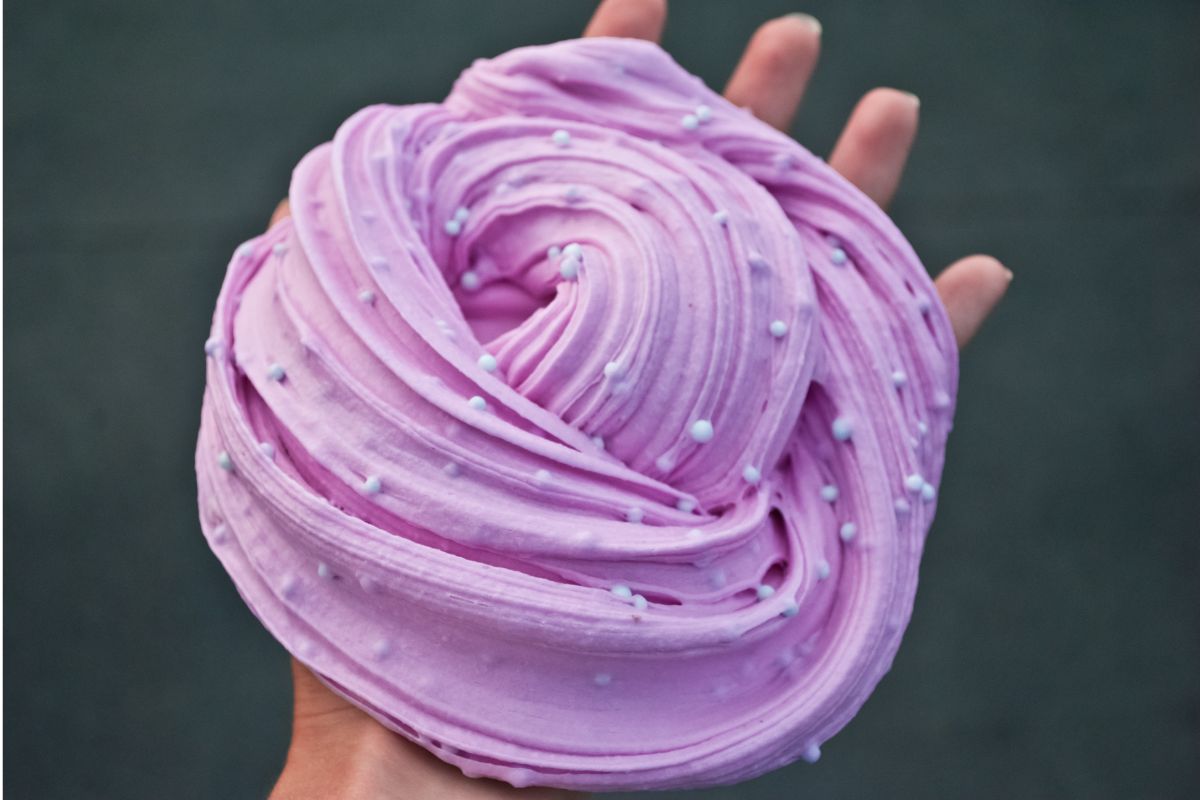
Shaving cream can be mixed into the glue foundation to create fluffy cloud slime. Follow the easy steps below to create your own cloud slime at home!
Approach 1: Creating Simple Cloud Slime
Step 1
120 mL of white school glue, or 12 cups, should be added to a bowl. About 4 oz (120 mL) is how much school glue often comes in bottles, which is just what you need!
Clear school glue shouldn’t be used because the result won’t be particularly cloud-like. Although water is a necessary ingredient in most slime recipes, it is not necessary in this case. Two drops blue food colouring can be added to the slime to give it a more intriguing appearance.
Step 2
Add 59 mL (one-fourth of a cup) of liquid starch. This is the chemical that will activate it, and you can find it in the laundry section of almost any supermarket.
A different activating substance, such as 1 tbsp (15 mL) of saline solution or 12 cups (120 ml) of borax water, may also be used.
Make sure the saline solution you’re using has sodium and boric acid in it if you’re using it. Additionally, the glue must first be mixed with 1/4 tsp (2.7 g) baking soda.
Borax water is made by combining 1/4 tsp (2 g) of the substance with 12 cups (120 mL) warm water. Borax is also available in a grocery store’s laundry section.
Step 3
Add more starch if the slime feels too sticky after stirring in the starch. Completely incorporate the starch into the slime using a spoon. Add more starch, 1 tbsp (15 mL), if the slime becomes too gooey and sticky, until you achieve the texture you like.
While you make the instant snow, set the slime aside. Don’t add more liquid starch than 14 cups (59 mL). More than that will cause the slime to become hard and rubbery.
Wait three to five minutes if the slime remains too stringy. This will allow the components some time to combine.
Step 4
Prepare 120 mL (1/2 cup) of instant snow per the directions. Buy a container of instant snow from a craft shop or online. Find out the amount of snow powder plus water to use by reading the directions on the can, then combine the two.
The artificial snow that you can spray on or the flaky, plastic-like material that arrives in bags are not the same as instant snow. If you can’t locate instant snow, you can get it by filling a diaper with water, letting it expand, then slicing it open and removing the instant snow within.
Alternately, grate or use your hands to break just enough Styrofoam to fill a half-cup (120 mL). Try to get it as perfect as you can.
Step 5
Mix the instant snow you’ve made with the slime. Wrap the ends of your slime over the snow after pouring the snow on top of it. Knead your slime to incorporate the snow. Start by adding around 14 cups (59 mL) instant snow, and then more if preferred.
Your slime will become firmer as you add more snow. After doing this, if the slime continues to be too gooey, stir in a couple drops of liquid starch. If there is any snow left over, let it dry thoroughly before putting it back in the can.
Step 6
When you’re not using the slime, keep it in a plastic container. The ingredients you add will determine how long the slime maintains its texture. You might detect a change in consistency after a few days if you utilised instant snow or diaper absorbing powder.
It ought to remain fresh for at least a week if you’ve used crushed Styrofoam. In a few hours or days, instant snow dries off. Since it’s already been included into the slime, it won’t likely fully dry out, but your slime might harden a little.
Approach 2: Creating Simple Cloud Slime
Step 1
In a bowl, add two and a half cups (630 mL) school glue. Add white school glue if you can to give the effect of a cloud.
An excellent substitute is clear school glue; using shaving cream will make the slime become opaque. Add two to three drops blue food colouring to the slime to make it more intriguing.
Step 2
The glue should be combined with 2 cups (470 mL) white shaving cream. Shaving cream is measured out and added to the bowl. Next, using a rubber spatula, carefully mix it into the glue.
If you use gel shaving cream, your slime won’t be fluffy, so be sure to use the foamy variety instead. The greatest option would be shaving cream for men because of how cloudlike its white tint is.
Shaving cream for women frequently has a pink or purple hue, which isn’t very cloudlike. Avoid doing this unless, in fact, you want a cloud that is pink or purple!
Step 3
Liquid starch up to 2/3 cup (160 mL) is stirred into the glue. Stir the slime thoroughly after every addition of starch, then add 1 tbsp (15 mL) at a time of starch to the glue until you achieve the desired texture.
While you make the instant snow, set the slime aside. Additionally, this will allow the slime additional time to develop a less unpleasant texture.
You’re done if all you wanted to do was make fluffy slime! It can be given extra texture by introducing instant snow or broken Styrofoam, but that’s all. In the laundry section of most supermarkets, liquid starch is readily available.
Step 4
79 mL of instant snow should be prepared according to the directions on the can. Purchase an Instant Snow or Instant Sno can. During the holidays, you can order it online or through a craft store.
To make the snow, read the directions on the can’s back, then measure out a third of a cup (79 mL). The fake snow that arrives in a bag or that is applied with a spray is not the same as instant snow.
If instant snow is not available, add water to a diaper and allow it to expand. Get the snow out of the diaper by cutting it open. It is essentially the same thing!
Another choice is to use a grater or your fingers to crush a little Styrofoam into a powder form. Use just enough to fill a 1/3 cup (79 mL).
Step 5
Mix the instant snow with the slime by kneading. Snow that is clumpy should first be fluffed up with your hands.
Add the instant snow after measuring out 13 cups (79 mL) for the slime. Fold the slime’s edges over the snow before kneading them in. Any remaining snow should be dried before being put back in the can.
Step 6
When you’re finished playing with the slime, place it in a container with a tight closure. The slime includes shaving cream, so after a few hours to a few days, it will begin to lose its texture.
After that, it may continue to be slimy and cloud-like, but it won’t be fluffy. Styrofoam-based slime will maintain its texture for a lot longer than instant snow-based slime. This is a result of the gradual drying out of instant snow.
Tips
Adding a little essential oil or sweet flavouring helps to create a perfumed cloud.
If you created your slime too rubbery by using too much activator (see also “Easy Slime Activator Recipe“), knead in 1 tbsp (15 mL) of water to make it gooey once again.
Your instant snow powder doesn’t need to be activated before being added to the slime. One spoonful at a time, while it’s still dry, add it in until the desired texture is achieved.
Warnings
With instant snow, young toddlers should be watched closely. When in contact with liquids, the substance expands and can be hazardous to ingest.
Final Thoughts
We hope you’ve enjoyed this article about how to make simple cloud slime. By following these easy steps, you’ll be able to make your very own cloud slime with your kids from home, perfect for those rainy days inside!

In an effort to get them to avoid excessive screen time ( and arguing! ) I turned to more creative avenues that we have all since grown to love.
I created this website in the hopes of inspiring more families out there to enjoy crafting and enjoy a shared bonding experience over it.
Please enjoy it and hopefully, you’ll find something to make that you can display proudly forever!
- Master Crochet Stitches for Cozy Creations - January 23, 2024
- Half Double Crochet Guide for Cozy Creations - January 23, 2024
- Elevate Your Space with Unique Macrame Creations - January 23, 2024
