Do you want to make a tie dye sweatshirt at home but don’t know how? Maybe you have seen others make tie dye clothing and are inspired to do your own?
Or are you curious about tie dye and want to know more? No matter what the question is that brought you here, we have the answers for you.
Knowing how to tie dye (see also “How To Make Reverse Tie Dye“) a sweatshirt can be tricky, especially if you have never done one before.
You head online to find out more but are met with conflicting and contradicting information that leaves you unsure where to turn or who to trust.
Frustrated and disappointed, you wonder if you will ever know how to tie dye a sweatshirt (see also “Valentine’s Day Tie Dye Craft“).
Well, no more! Today, we are here with the answers you need! Keep reading to find out how to tie dye a sweatshirt at home!
We have a step-by-step guide you can follow and plenty of tips and tricks that make the process super simple. Let’s get straight into it!
Which Sweatshirts Are Best For Tie Dye?
The material you use is one of the most important parts of tie dye. After all, it dictates how well the colors will show and how easy the process of tie dying is! We recommend that you use white sweatshirts that are 100% cotton.
You should especially use cotton sweatshirts if you are using a tie dye kit. This ensures that the dye sets well and gives you the best results.
You can use sweatshirts that are less than 100% cotton, but you will need to be careful.
If there is more than 50% of a synthetic material in the sweatshirt (like polyester), the dye might rinse out. This leaves you with a pale tie dye shirt that you won’t want!
You can also use colored shirts if you want, but the tie dye colors might not turn out as you expect.
You can choose any style of sweatshirt that you want! A zip-up hoodie, zip-up sweatshirt, or pull over can all be tie dyed! You will just want to consider the design and shape you want to create with the tie dye.
Women’s sweatshirts tend to have more curves, so any straight lines might curve on the side. Mens sweatshirts tend to have more straight lines on the sides that you can work with.
Where Can I Get Sweatshirts For Tie Dye?
You can find 100% white cotton sweatshirts or other clothes to tie dye easily. Most craft stores will have 100% cotton materials for you to use.
Or you can head online to clothes stores or Amazon to find a white cotton sweatshirt. There are usually plenty of options too, so you can find one within your budget.
Materials Needed
So what do you need to create a tie dye sweatshirt? Well, we have a list of all the materials you need below. We have based this list on the assumption you are using a tie dye kit.
We recommend using one as it comes with a lot of the materials you need. Plus, you can find them at an affordable price, making them suitable for any budgets.
Here is the list of materials you need:
- Paper towels
- Tie dye kit
- Sofa ash and tie dye dye (if you don’t have the tie dye kit)
- Latex gloves
- Plastic wrap
- Rubber bands
Once you have your materials, you are ready to get started! We recommend laying them all out on a table (see also “How To Make A DIY Light Table“) or floor so you have everything you need within reach!
How To Tie Dye A Sweatshirt
Now that you have your materials, let’s look at how you can tie dye your sweatshirt. We have a step-by-step guide below that you can follow to create your shirt.
Step 1 – Prepare Your Shirt
To start, you need to prepare your shirt. Wash your shirt before you begin to ensure there isn’t anything on there that could ruin your tie dye.
Once washed, you will want to ring out the shirt until it is damp, with no drips. If you choose not to wash your shirt (totally up to you), you will want to soak it in water and ring until it is damp.
A damp sweatshirt is easier to shape, tie, and prepare for dye. You want to tie the shirt tightly to get a pattern that shows up well. By wetting the sweatshirt, you are removing any air, allowing it to be tied tightly.
Once rung, you can shape the sweatshirt ready for dyeing. To do this, fold, scrunch, twist, or wrap the sweatshirt and tie it using rubber bands.
You can do this randomly, or you can use check out designs and patterns online. You could make a heart shaped tie dye sweatshirt, or any pattern you want!
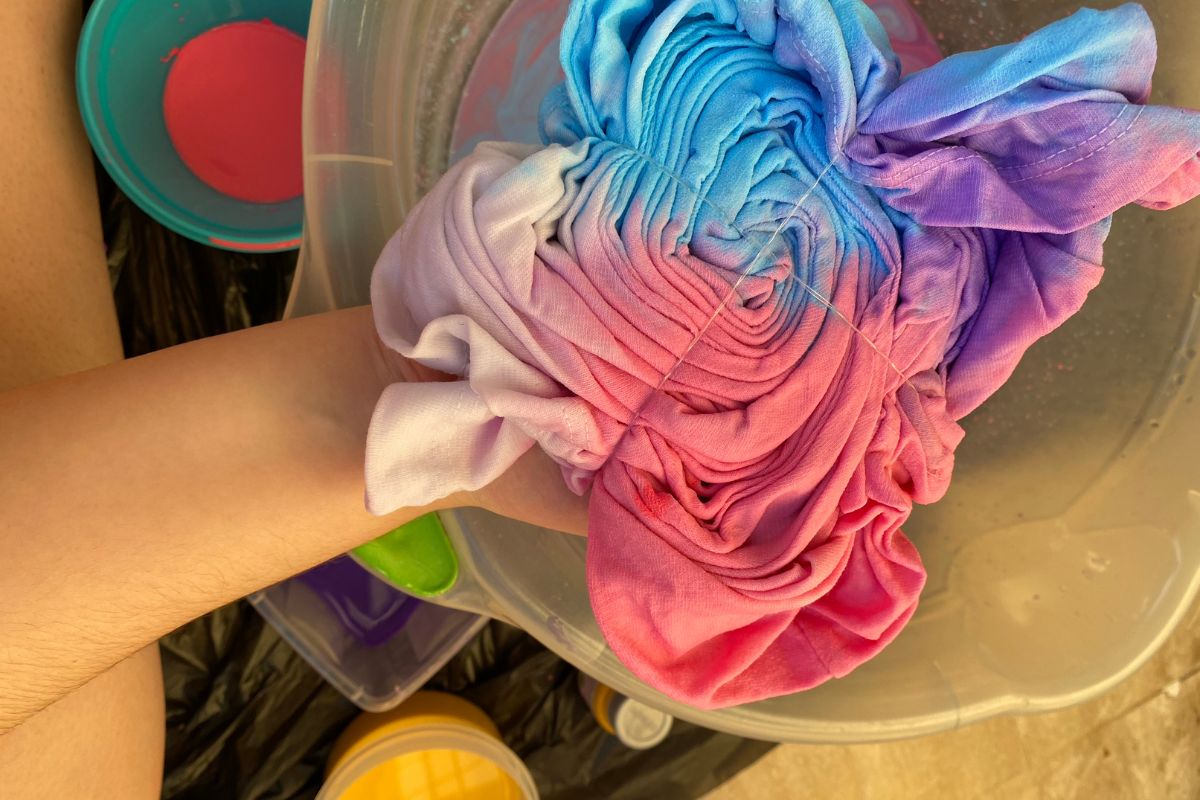
For a classic spiral design, pinch the middle of the sweatshirt, grabbing the back as well to dye both sides. Then twist the middle from where you have pinched the fabric.
Continue until you reach the sleeves. You can then add some pleats and folds before wrapping the sleeves around the rest of the sweatshirt.
Keep wrapping until you get a tight spiral. You will want to keep the shirt lying flat so that the layers don’t bunch over each other.
Once the spiral is tight and as you want it, use a rubber band across the middle to secure it. Keep adding rubber bands until the shirt is held together.
Step 2 – Prepare The Soda Ash
If you have purchased a one step tie dye kit, then you can skip this step! We still recommend doing it, though, as it will make the colors even more vibrant!
If your tie dye kit comes with soda ash, you will need to mix 1 cup of soda ash with a gallon of warm water. You will need enough liquid to soak the sweatshirt, so you might need to double the quantities of soda ash and water.
Stir the soda ash into the water until it dissolves.
Once dissolved you can add the wrapped up sweatshirt into the mixture. Leave it to soak for at least 10 minutes. We recommend swishing the shirt and flipping it over half way through.
This allows the mixture to incorporate the whole shirt for a better and brighter color! You can also separate the folds here, allowing the mixture to seep into the shirt.
Step 3 – Add The Tie Dye
Next, follow the instructions on your Tie Dye kit to prepare the dye. You might need to add warm water to the bottles. There will usually be a line that you need to fill them too, before shaking the bottle.
This allows the powder to mix with the water, continuing shaking until all the powder is dissolved and mixed with the water.
When shaking the bottles, we recommend holding them with a paper towel. This stops any leaks wreaking havoc on your hands or clothes!
Even when the lids are secured, the dye can leak, so make sure you take care! We also recommend wearing gloves when mixing the day. It makes cleaning up afterward much easier!
Another method you can use is to fill the dye bottles part way with water and shake them to dissolve. You can then add the rest of the water to the line.
With less water in the bottles when you are shaking them, you are less likely to have leaks and end up covered in dye!
Step 4 – Add Your Dye To The Sweatshirt
Once the bottles have all been prepared, it is time to tie dye your sweatshirt! Start by covering your table (or surface you are using) in plastic wrap and popping some gloves on.
You will want the plastic wrap to be large enough to wrap around the sweatshirt, with some overlap too.
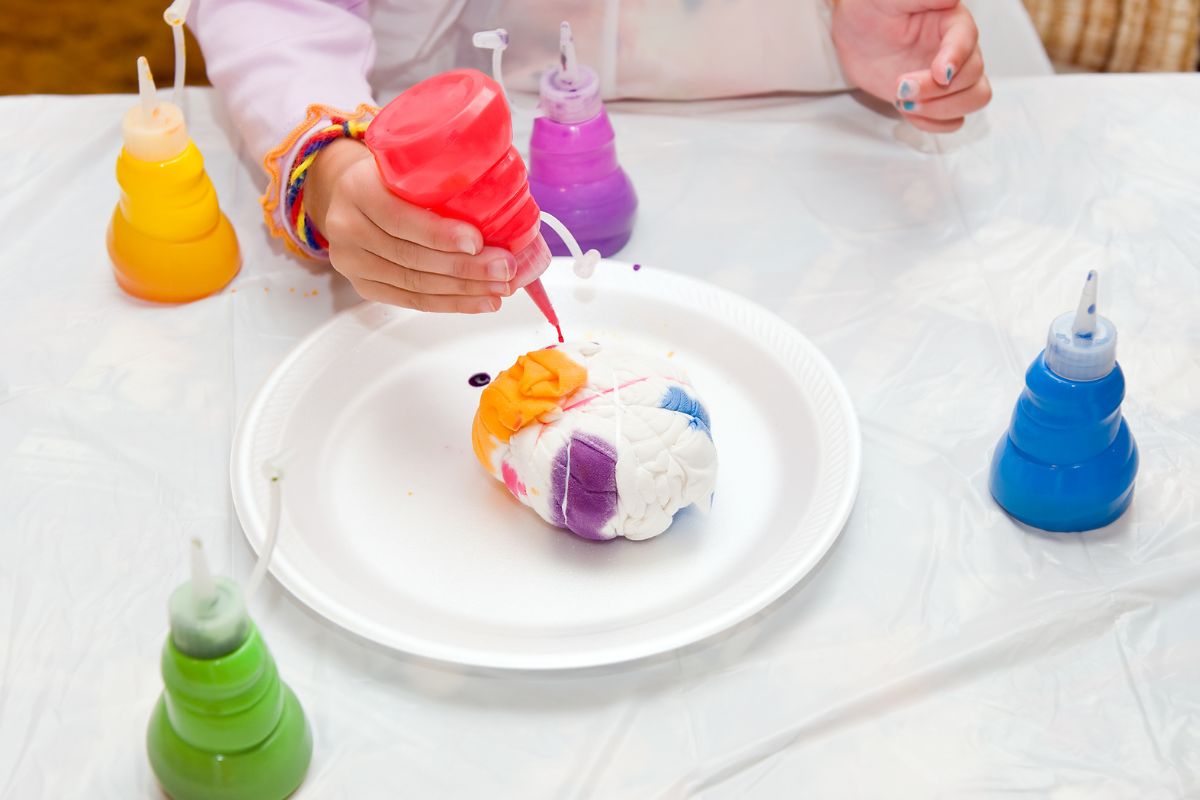
Put the sweatshirt on the plastic wrap and grab your dyes! We started with the lightest color and added it to parts of the sweatshirt. The dye should pour out easily from the bottles. Make sure you turn the sweatshirt to get both sides!
To create our spiral design, we added yellow to one of the segments before flipping the shirt over and repeating it on the same section.
Then, continue to add the lightest dye to wherever else you want it in the shirt. For our spiral, we added it to the opposite segment.
If you are following a pattern or design, make sure you check where the colors go and follow any instructions you might have.
Add your next color, either on the section next to the one you have dyed, or another one. Remember to follow any pattern you have and apply dye to both the front and back of the sweatshirt.
Continue adding colors until you have added all the ones you want.
Take care here that none of the colors mix. You do not want them to mix or drip and create an ugly brown on your bright shirt!
Make sure you use your paper towels to wipe any dye on the plastic wrap to stop it mixing with the dye on your shirt.
Step 5 – Set The Dye
Once all the dye is applied, it is time to set it! Carefully pick up the plastic wrap and wrap it around the sweatshirt.
Wrapping it ensures that the moisture remains inside the shirt, helping it to set. The last thing you want is for your tie dye sweatshirt to dry out here!
Leave the sweatshirt for 12 to 24 hours. This is plenty of time for the dye to set. If you didn’t prewash your shirt, we recommend leaving it for the full 24 hours.
Step 6 – Rinse The Dye
Once enough time has passed, carefully unwrap the sweatshirt. Discard the plastic wrap in the bin. Leave your sweatshirt tied and rinse it under warm water.
We would keep gloves on here, as the dye will get everywhere! You don’t want to be left with stained hands.
As the dye rinses out, you can take the rubber bands off. Try and keep the rubber bands if you want to keep them for another project. If you are struggling to remove them though, you can cut them off.
Keep rinsing the sweatshirt under the water. You want to rinse it until the water runs clear. This might take a few minutes, so be sure to have some patience.
Once the water is clear, wash your sweatshirt. We recommend putting it in the washing machine on its own. The last thing you want is any leftover dye running and ruining your other clothes.
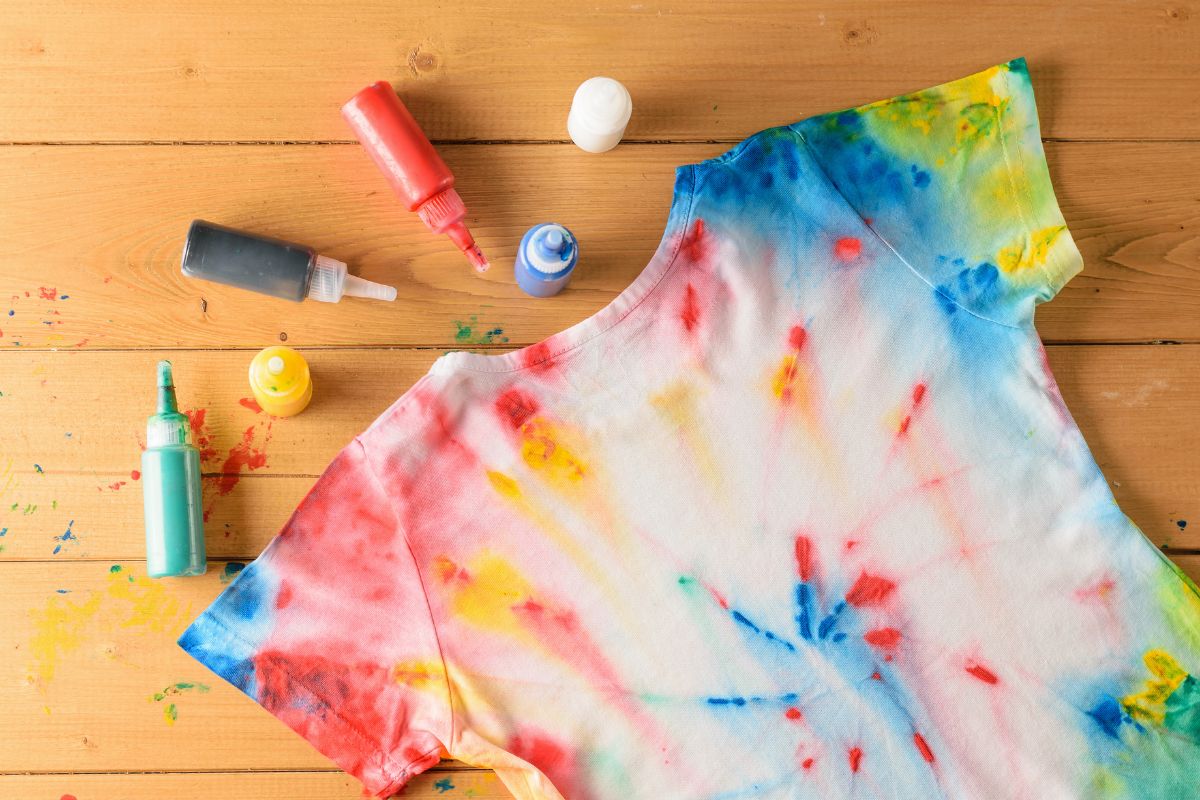
After the sweatshirt has been washed, you can put it in the dryer. You can also hang it on your washing line if the weather is fine, whichever you prefer. Once dry, the shirt is ready for you to wear!
And there you have it, your tie dye sweatshirt is now complete! It isn’t as challenging as you might have thought, and can be done in no time at all!
The longest part is waiting for the dye to set, but the process of creating the sweatshirt doesn’t take too long.
Tie Dyeing Sweatshirt
To help you make your tie dye sweatshirt dreams a reality (see also “Make Your Own DIY Dream Catcher“), we have some tips that you can use! These will also make the process easier, let’s take a look at them now!
How To Make Sure You Have Enough Tie Dye For Your Sweatshirt
You don’t want to not have enough dye on your shirt, or run out! Otherwise you will end up with a sweatshirt that is mostly white, and what is the point of that?
Make sure you are separating your layers as you go. Check in between each layer as you add the dye, and add more so that there are no white parts.
You can insert the dye bottle between the layers and squeeze to ensure the dye gets all over the section!
You can also squish the sweatshirt and push the dye into the sweatshirt to help it spread.
Swap Rubber Bands For Zip Ties
If you can’t get your hands on rubber bands, or are looking for an alternative, you can use zip ties. You get cleaner lines with zip ties and you can tighten them with ease. If you are new to tie dye, zip ties can be a lot easier to use.
Plus, you can remove them easily too, especially when the sweatshirt is wet. Zip ties offer cleaner lines too.
They wouldn’t have been the better choice for our spiral, but if you want to create straight lines,, or are following a more intricate pattern, zip ties are a fine choice!
Zip ties can be purchased in store or online at an affordable price too.
Leave Space Between Colors
No matter the size of your sweatshirt, we recommend you leave a little space between each color. This doesn’t need to be a lot of space (about a centimeter), which is the size of a rubber band.
This will ensure there is some white space between your colors (creating the tie dye effect). It also helps to prevent the colors from mixing with one another (and creating an ugly brown).
Check Out The Color Wheel
If you are creating your own pattern and not following a template, we suggest you spend some time refamiliarizing yourself with the color wheel.
This will help you pair colors that work well together to create stylish patterns and designs.
By knowing what colors mix too, you can create new colors! A tie dye kit usually comes with the primary colors, which you can mix to create any color you want!
You can mix the following to crete colors that we love in tie dye sweatshirts
- Red and yellow will make a bright orange (see also “Red Leaf, Yellow Leaf Inspired Craft Ideas“)
- Add a bit of teal to yellow for green
- Purple and pink create a bright fuschia
You can also purchase different colors of tie dye dye that you can use alongside your kit if you want.
Before purchasing your tie dye kit, check to see what colors it comes with. It might also come with suggestions of what colors you can make with the dyes too.
If you want some more inspiration you can check out color theory to find out more about what colors work well together and what pairings should be avoided.
This will help you create a wonderful sweatshirt with colors that match and complement each other! There are plenty of helpful guides and articles about color theory online to help you.
Clean As You Go
Make your craft easier and clean as you go! The plastic wrap over the table will help to protect your surface from any dye, but make sure you wipe it regularly as you go.
Doing so will make it far easier for you, and prevents the dye from mixing. It also means that when you wrap the sweatshirt in the wrap, there won’t be any excess dye on it.
This excess dye could mix with other colors and leave you with a brown that you did not want!
You will also want to clean any gloves you are wearing as you go too. This will ensure that there is no excess dye that will cause you issues along the way.
If you don’t want to continue rinsing your gloves, you can always get a multipack and change them when the gloves start to get too dirty.
You will also want to check the gloves frequently and change them once there are any holes or rips, as dye can get through these gaps and leave you with stained hands!
Tie dye dye isn’t the easiest thing to get rid of, so make sure you clean as you go and protect your skin.
Final Thoughts
And there you have it, your complete guide to creating a tie dye sweatshirt at home (see also “The Complete Guide To DIY Tie Dye Socks“) (see also “Ice Tie Dye – Your Complete Guide To This Craft“)!
This method allows you to create your own sweatshirt in the color and design that you want. With our six simple steps, you can create the tie dye sweatshirt of your dreams!
Make sure you follow our steps and pre-wash your sweatshirt beforehand. This allows the colors to pop and creates a vibrant tie dye shirt!
Plus if you wash it before, you don’t need to soak it and worry about ringing out all the excess water.
We have also included plenty of tips and tricks that will make the process of dyeing smooth sailing.
By separating each section of the sweatshirt to get the most color in, checking the color wheel, and cleaning as you go, not only will your sweatshirt be a wonderful and vibrant piece of tie dye clothing, but it will be easy to do!
Don’t forget to check out the color wheel and color theory too. You can also make use of the patterns and designs online that will allow you to create funky tie dye sweatshirts.
Whether you want a spiral, heart-shaped, rainbow, or star tie dye sweatshirt, we are sure you will be able to find a pattern and create it!
Armed with the tips and steps from today, you can go forward and create the tie dye sweatshirt you want. Good luck!

In an effort to get them to avoid excessive screen time ( and arguing! ) I turned to more creative avenues that we have all since grown to love.
I created this website in the hopes of inspiring more families out there to enjoy crafting and enjoy a shared bonding experience over it.
Please enjoy it and hopefully, you’ll find something to make that you can display proudly forever!
- Master Crochet Stitches for Cozy Creations - January 23, 2024
- Half Double Crochet Guide for Cozy Creations - January 23, 2024
- Elevate Your Space with Unique Macrame Creations - January 23, 2024
