There are few things in the world that are as magical as the way Disney makes you feel. Whether you are an adult or a child, seeing the iconic ears and dream castle is enough to flood your senses with all the joy and warmth of your childhood.
However, it can be expensive to purchase new items of memorabilia from Disney, especially if you visit their parks on a regular basis.
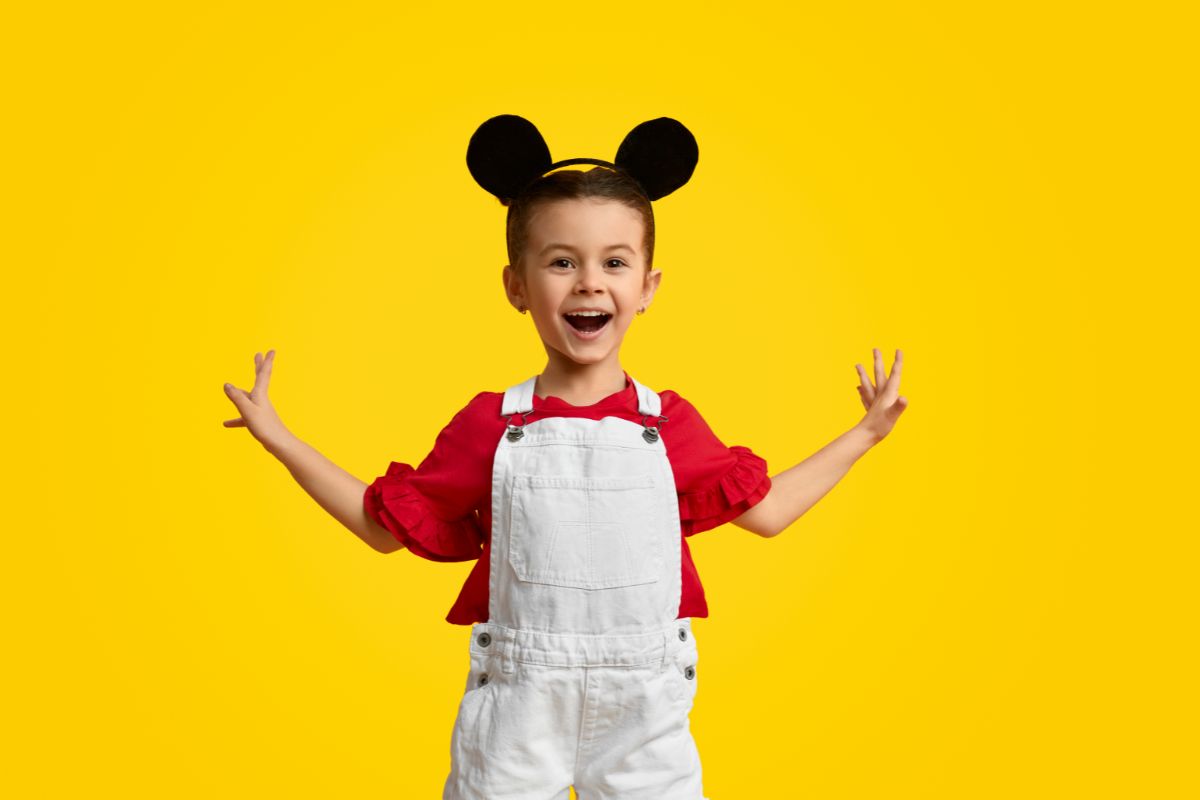
Thankfully, it can be super fun and quite easy to make your own things to make your trips to parks feel that little bit extra special. Minnie Mouse ears are one of the most iconic visuals that Disney has bestowed upon the world.
With this step-by-step guide, you will be able to make your own Minnie Mouse ears that have their own sprinkling of Disney magic. Best of all, you can make these ears using things you might already have at home.
Materials
The first step in making your own light-up Minnie Mouse ears is to gather the materials that you will need to make them. This is a fairly easy craft to make, therefore, there are only a handful of materials required. Best of all, you might already have a few of them lying around your home.
Fabric
The first thing that you need to make these ears is some fabric. To create the best effect with your ears, you are going to need two, distinct colors of fabric.
If you want a classic look pair of Minnie Mouse ears, black and red fabric will be needed. However, there really is no limit to the colors of fabric that you use. These ears are so iconic that they will be recognizable in any color.
When selecting your fabric, it is important to make sure that the material isn’t too thick. You will need the lights to be able to shine through the fabric for the best effect, so thicker materials should be avoided.
Sequinned material works really well for this project as it is thin enough to let the light through, and the sequin adds extra fun and shine to the ears.
Finally, remember that you will need more fabric to make the ears than to make the bow. Make sure that you have purchased enough material to cover the entire ears and the headband in your chosen color.
The bow uses significantly less material. You will also need a small amount of satin ribbon to add the finishing touches to the headband. Again, this can be any color you like.
String Lights
To bring the Disney magic to these DIY ears, you will need to select some string lights that will easily fit inside your ears. The ideal length of the string lights for this project is around 6.6ft.
The most important thing to consider when selecting string lights for this craft is the power source. Unless you want to be plugged into an outlet while you wear these ears, the lights are going to have to be battery-operated.
You might already have some battery-operated string lights in your home. However, be mindful of the size of the battery pack as this will need to be attached to the headband.
There are plenty of string lights available online that feature slim battery packs that are perfect for this project.
The color of the string lights is also something that you will want to consider. White lights are going to give the most classic look.
However, you can use other colored lights, such as blue or green, to create different effects. This can be a fun way to incorporate other Disney characters that you love into your ears.
Headband
The headband forms the main basis of the framework for these ears. In general, it is possible to make these ears with any sort of headband that you have, although some are better than others.
A wider headband that has been covered with the fabric already is a great option for these ears. The headband will be wide enough to comfortably fit the ears and the battery pack, and adding your chosen fabric will make it even more comfortable for you or your child.
While a wider headband is better than a thin plastic one, it is also important not to go too far the other way.
Any headbands that have a significant amount of quilting or padding on them already will not be a sturdy enough base for your ears. With these types of headbands, you risk your ears being floppy or wobbly on the cushioning.
Fillable Disc Ornaments
To make the actual ears themselves, you will need a couple of clear, fillable, disc-shaped ornaments. You may already have some of these discs left over from previous holiday seasons, in which case, you can simply repurpose them for this craft.
However, if you don’t have any lying around your home already, most major craft stores will have some that are perfect for this project.
If you do not live near a large craft store and cannot find them in your local craft store, these ornaments are super easy to purchase online from places such as Amazon or Etsy.
Hot Glue Sticks
Finally, you will need some hot glue sticks to help bring these magical ears to life. It is also possible to sew some of the elements together but this is unnecessary (see also “How To Use A Traditional Singer Sewing Machine“).
Hot glue works perfectly well to hold all the components of these ears together.
Tools
There are also some crafting tools that you will need to make these ears. Thankfully, the tools that you need are quite basic and if you are a regular crafter, you will likely already have most of them lying around your home anyway.
Hot Glue Gun
What good are hot glue sticks without a hot glue gun? This tool will be required throughout the process of making these ears.
If you are going to be making these ears with your children, make sure that you have somewhere safe but accessible to place the gun so that little fingers can’t get hold of the end.
Ears Template
While it is possible to cut out the fabric freehand, this method leaves a lot of room for error which can be time-consuming, costly, and frustrating.
Making a template for the ear fabric is a great way to make the whole process a lot smoother and ensure that you don’t waste fabric which can be quite expensive.
You can make your own template by measuring around the disc ornaments, just remember to make the fabric a little bigger than the disc so that you have some extra to work with.
Alternatively, you can download and print off some premade templates that are perfect for wrapping around the ear discs.
There are plenty of options available online, just remember to print them out using the actual size and avoid using margins when you print.
Most templates come with a ruler marking on the edge of the page so that you can check whether the page is true to size before you begin cutting any fabric.
Scissors
The scissors that you use for this project doesn’t have to be fabric scissors, however, it could help to reduce any fraying that may occur if they are.
Because this project involves gluing the fabric rather than sewing it, fraying is slightly less of a concern. The scissors can be used to cut out the fabric and tidy up the edges when you are applying the finishing touches to the ears.
Rotary Cutter
You can also use a rotary cutter to cut the fabric for this project. If you have never seen a rotary cutter before, it is essentially the same as a pizza cutter, except we wouldn’t recommend using your pizza cutter.
The edge on the blade of a rotary cutter for fabric is super sharp and will cut through your fabric with ease, even if it is sequined.
This tool isn’t necessary as scissors work fine, however, if you want to work with fabric more in your crafts, this can be a good investment item.
Making The Framework
The first main step in making these magical Minnie Mouse ears is to make the framework. This step focuses on preparing all the components that you need to begin creating these stunning light-up ears.
Making The Ears Template
The first important step that will help this craft go without a hitch is to prepare the template for the fabric of the ears.
As we mentioned above, there are multiple places online where you can download and print off a template for both the ears and the fabric that needs to cover the headband to tie everything together.
When you are printing the templates, it is important to make sure that you are printing them with the “actual size” setting. This will help ensure that your template is the right size to fit over the ornament discs.
To help avoid wasting fabric by cutting it incorrectly, you should make sure that you download a template that features a size scale on the side of the page. This will allow you to double-check that the template is the right size before any fabric or paper is cut.
When you cut out the templates, make sure that you cut as close to the line as possible. This will help make your fabric cutouts as accurate as possible and avoid wasting your fabric.
You do not need a template for the bow section of the ears as this is just a square that you can measure out on the fabric you have.
Prepare The Ear Discs
Once you have prepared your templates for the ears, it is time to prepare your ear discs. This step is super simple and requires very little work. When you get the discs, they are designed to come apart so that you can fill them with whatever you want to fill them with.
These ornament discs (see also “How To Make Christmas Popsicle Stick Ornaments“) come with a small plastic nub at the top where you would normally attach string or ribbon to hang the ornament on your Christmas tree.
This part of the ornament should be pulled off of the ornament to leave a slight gap at the top of the ornament. This hole will allow the string of the lights to pass between the two ears.

Add The Lights
Adding the lights is one of the longest steps of this entire craft project. It is also one of the most important steps to help you capture the Disney magic of these light-up Minnie Mouse ears.
If you are doing this craft with your children, this is a step that you might want to do yourself to speed things up a little bit and avoid burnt and sticky little fingers.
To make this step go as smoothly as possible, make sure that you unravel the string lights fully before you start attaching them to the ornaments.
This will give you the opportunity to remove any tangles and knots from the lights before you bring out the glue gun. Make sure that you have enough space to keep your lights stretched out to keep them from tangling up again.
With a standard 6.6ft string light set, you should have ten lights in each disc. When you are gluing the lights into the disc, make sure that you glue the wire close to the lights but not on the light itself.
Glue on the LED lights will dull their shine and make the ears less effective. You should make sure that the lights are evenly spread out from each other and throughout the disc. This will involve spiraling the string of lights inside the ornaments.
Once you have glued half of the lights inside one of the discs, the wire should exit the disc through the gap that we made earlier.
The same wire should then enter the other disc through the gap on that disc too. Make sure that the wire between the two discs doesn’t contain any lights.
The other ten lights should be glued in the same way in the second disc. Allow the glue to dry before snapping the discs back together to create the ears. The battery pack of the lights should be left outside of the discs.
Making The Ears
Now that the framework for the ears has been prepared, it is time to start making the discs look like Minnie Mouse’s ears. The framework that you have just prepared will make this process a lot easier and more manageable.
Cut The Fabric For The Ears
The first step in creating the ears is to cut the fabric that you are using for your ears. This is where the templates that you cut out earlier come in handy.
In order to make sure that the templates are as effective as possible, you should add a small piece of double-sided tape to the center of the template to prevent it from moving on the fabric as you cut it.
Using a rotary for this step is easier and provides a cleaner edge for your fabric, although you will be able to tidy up the edges later on.
For this step, you will only need to cut out fabric to cover the ornament discs. This means that you should have a total of 4 circles of fabric to cover one set of ears.
If you want darker ears, you can cut out 8 circles for one set of ears. Adding more layers of fabric will make the lights appear duller through the ears.
Attach The Fabric To The Ears
Once you have cut out the fabric for the ears, it is time to attach it to the discs. You will need your glue gun and some patience for this step. It is important to make sure that the fabric is pulled taut across the surface of the disc to give the ears a better appearance.
The best way to attach the fabric to the disc is to start in the middle. Place a small dot of hot glue in the center of the fabric, and attach it to the center of the disc. Allow this glue to become tacky enough to hold the fabric in place.
From here, you can begin to gently stretch the fabric to the edges of the disc. To get the most taut results, it is best to attach opposite sides of the fabric to the disc after one another.
Repeat this process until you have covered both sides of both of the discs. You will likely have some excess fabric around the edges of the discs. This should be left alone while the glue dries and can be tidied up later.
If you are adding multiple layers of fabric because your fabric is thin, each layer should be added one at a time using the same method.
When adding more than one layer to your ears, it is important to make sure that you are neat with the glue gun and avoid having globs of glue seeping out onto the surface of the fabric.
Making The Headband
While the glue on the ears is setting fully, it is time to make the headband. This is a super easy step that helps to tie the whole look together.
When you search for templates for Minnie Mouse ears, they often come with a template to cut out fabric to cover the headband, if your template doesn’t, you can find a separate template for your headband.
Cut The Fabric For The Headband
The first step in making the headband for your Minnie Mouse ears is to cut out the fabric that you are going to use.
You can choose any fabric to cover the headband, however, it looks really nice to match the headband fabric to the ears. Again, for this step, using a rotary cutter will give you a cleaner edge to your fabric.
You will also need to cut some satin ribbon that is long and wide enough to line the inside of the headband. This will protect your hair and scalp from the fabric of the headband which is particularly useful if you are using sequinned material.
Attach The Fabric To The Headband
Once you have cut out the fabric that you need it is time to attach it to your headband. The same method that you used for the ear discs can be applied to this step too. The best method is to attach the middle of the fabric to the middle of the headband.
From this point, you can gently stretch the fabric along the rest of the headband to ensure that the fabric is taut and neat. Repeat this step for both sides of the headband.
When applying the fabric to the headband, make sure that you attach it to the outside of the headband and fold the excess round to the underside of the headband to make it more secure.
Add Finishing Touches To The Headband
Once the main fabric has been attached to the headband, it is time to add the finishing touches that will make the headband look more professional and feel more comfortable when the ears are worn.
For this, you will need to add the length of the satin ribbon to the underside of the headband. This will not only prove a soft and smooth surface to sit against your head, but it will also cover the edges of the fabric that you just glued to the headband.
If you have cut the satin ribbon from a larger piece of satin, or even from a roll of ribbon, you should fold the cut edges over and glue them in place before attaching it to the headband. This will help give the ribbon a sleeker finish and will help avoid fraying over time.
Making The Bow
While your headband is drying, it is time to make the bow to make these ears look like the iconic Minnie Mouse ears.
Cut The Fabric For The Bow
Firstly, you need to cut the fabric that you are using for the bow. Red sequined material looks stunning for this bow. To cut this fabric you do not need a template. Instead, you should cut an 8×11-inch rectangle from your fabric.
This will form the bow through a series of folds. You should also cut a strip of the same material that is around an inch wide and about 3 inches long. This will be used to form the center of the bow.
Fold And Glue To Form The Bow
To create the main shape of the bow, you will need to fold your rectangle of fabric multiple times. If you want to, you can practice making the shape before you apply any glue to make sure that you know what you are doing.
Start with the fabric laying face down on a flat surface. Fold the top and bottom edges towards the middle. These should be the longer sides.
Overlap the fabric a little and glue it in place. At this point, you should make a small fold at each of the open, short ends and glue it to avoid fraying.
Next, bring the two short sides together in the middle and glue them in place. These sides should just meet in the middle instead of overlapping like the first sides.
Now, there are a few folds that are required to form the classic bow shape. Add a small amount of glue to the center of the rectangle and fold the fabric in half lengthways. Hold the fabric in place until the glue dries. This will make the center of the bow.
Once the glue has dried, add another small amount of glue near the fold you just made, and try to get it as central as possible.
Fold one side of the fabric back into the glue that you just applied. Again, hold this fold until the glue has dried. Repeat this process on the other side as well.
Then, you should add a small amount of glue on top of the fabric you just folded. Fold this part back to the center and hold it until it dries. At this point, the fabric will begin to take the shape of Minnie’s iconic bow. Repeat this for the other side too.
Add The Finishing Touches To The Bow
Once the main part of the bow has been folded and glued into shape, it is time to add the finishing touches to the bow in the form of the central ribbon. For this part, you will need the strip of fabric that you cut from the same fabric.
Fold the strip of fabric along the longer sides as you did with the rectangle. Make sure that the sides overlap slightly so that they can be securely glued. Next, glue one of the short ends to the bottom of the bow that you made.
Wrap the strip around the center of the bow and secure it at the bottom again. Trim off any excess rather than continuing to wrap around the bow.
Assemble The Light-Up Minnie Mouse Ears
Now that you have created all of the components of these magical light-up Minnie Mouse ears, it is time to assemble them all together.
Attach The Ears To The Headband
The first step of assembling the ears is to attach the ear discs to the headband. This is a fairly easy step, you just have to be mindful of the wires from the lights.
The distance between the ears is dictated by the wire of the lights between the discs, ideally, it should be around 4.5 inches.
If you haven’t left any lights outside of the discs, they should sit the perfect distance apart to form the iconic Minnie Mouse ear shape. Remember to trim any excess fabric from the ears before you attach them to the headband.
To attach the ears, simply add some glue to the bottom of the ear disc and attach it to the headband. Hold the ear disc in place until the glue has fully dried.
Then move on to the other ear and repeat the process. The wire between them should be stretched across the top of the headband.
Attach The Battery Pack To The Headband
Once the ears are attached, it is time to place the battery pack onto the headband. Begin by folding the excess wire up into a compact bundle.
Position the bundle of wires toward the back of the headband to allow room for the bow. This might mean that they sit just over the edge of the headband. Glue the bundle of wires to the top of the headband and glue the battery pack on top of the bundle.
Attach The Bow To The Headband
At this point, your light-up ears will look like Mickey’s ears, you can leave them at this stage if you want to make Mickey ears as well. However, to make Minnie’s ears, it is time to attach the bow.
The bow should be glued in front of the battery pack and wires. It is very convenient to hide the pack and wires from the front. Simply add a small amount of glue to the bottom of the center of the bow and attach it to the center of the headband.
Hold it in place until the glue has dried. Once the glue has dried, your light-up Minnie Mouse ears are ready to go, perfect for a night spent at Disneyland or just around the house.
Top Tips For Light-Up Minnie Mouse Ears
As with any intricate craft project, there are a few tips and tricks that can help you to get the best results the first time.
Glue The Lights Properly
This top tip has two different parts to it. First of all, the lights should be firmly attached to the inside of the disc. This will prevent the lights from moving around the disc while you are wearing the ears.
Not only can this affect the appearance of the ears when they are lit up, but it can also be really annoying to hear the lights rattle around the ears while you are running around Disneyland.
You should also be mindful not to get any of the glue on the LEDs themselves as this can dim the light and affect the overall appearance of the ears. To help avoid this, it is best to turn the lights on while you are gluing them so you get an idea of what they look like.
Glue The Battery Pack The Right Way
When you are attaching the battery pack to the headband, make sure that you glue it so that the screws of the battery cover are facing upwards. This makes changing the batteries much more convenient than having to remove and re-glue the pack each time.
Glue From The Middle Outwards
When you are applying fabric to any of the components of these ears, it is best to glue from the middle outwards.
This allows you to apply the proper amount of tension to the fabric as you apply it. Also, remember to apply the glue little by little to help avoid mistakes.
Final Thoughts
These DIY light-up Minnie Mouse ears are super easy to make and require no sewing at all. Best of all, you can make these ears using almost any fabric that you want and you can make multiple pairs for different occasions.

In an effort to get them to avoid excessive screen time ( and arguing! ) I turned to more creative avenues that we have all since grown to love.
I created this website in the hopes of inspiring more families out there to enjoy crafting and enjoy a shared bonding experience over it.
Please enjoy it and hopefully, you’ll find something to make that you can display proudly forever!
- Master Crochet Stitches for Cozy Creations - January 23, 2024
- Half Double Crochet Guide for Cozy Creations - January 23, 2024
- Elevate Your Space with Unique Macrame Creations - January 23, 2024
