Are you ready to unleash your inner artisan and embark on an exciting journey of candle-making? Crafting homemade candles not only ignites a sense of joy and accomplishment but also offers a multitude of benefits. Whether you’re seeking a relaxing hobby, personalized gifts, or a touch of cozy ambiance, making candles at home is the perfect creative outlet for beginners.
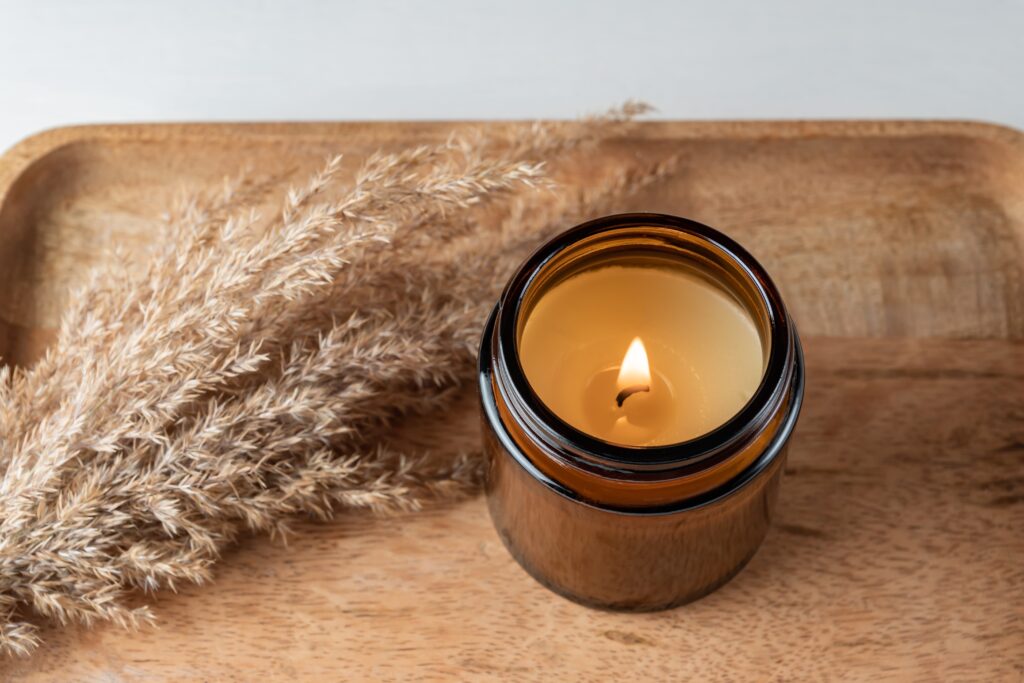
Imagine the warm glow of a flickering candle, casting a gentle radiance throughout your space. Homemade candles hold a special place in our hearts, adding a personal touch to any setting. Not only do they infuse our surroundings with delightful fragrances and vibrant colors, but they also create a tranquil atmosphere that soothes the soul. In a fast-paced world, taking the time to craft your own candles allows you to slow down, unwind, and reconnect with your creative side.
Benefits of Making Candles at Home
Creating candles from scratch offers a myriad of advantages beyond the sheer pleasure of the process. Firstly, it allows you to customize every aspect of your candle, from selecting the wax type to choosing the perfect container and fragrance. This level of personalization ensures that each candle reflects your unique style and preferences. Making candles at home can be a cost-effective alternative to purchasing expensive store-bought ones, providing you with a delightful and budget-friendly indulgence.
Basic Overview of the Candle-Making Process
Fear not, aspiring candle-makers! While the art of candle-making may seem daunting at first, the process is surprisingly straightforward and enjoyable. It begins with gathering supplies, including wax, wicks, containers, and fragrance oils. Next, you’ll melt the wax, add your chosen fragrance and color, and carefully pour it into the containers. After allowing the candles to cool and set, you can adorn them with your personal flair, and voilà! Your homemade candles are ready to illuminate your world.
So, grab your apron, prepare your creative spirit, and get ready to embark on an enchanting journey into the world of homemade candles. From experimenting with various scents and colors to creating personalized gifts for your loved ones, this delightful craft offers endless possibilities. Get ready to bask in the warmth and beauty of your very own handmade creations as we guide you through the process step by step. Let’s ignite your imagination and illuminate your life with the magic of homemade candles!

List of Essential Materials
Before we dive headfirst into the captivating world of candle-making, it’s essential to gather the necessary materials that will fuel your creative fire. But fear not, my fellow candle enthusiasts, for we shall embark on this supply-gathering adventure with a skip in our step and a twinkle in our eye!
To bring your homemade candle dreams to life, you’ll need a handful of key ingredients and tools. So, let’s do a quick checklist dance, shall we? Here’s what you’ll need:
- Wax: The heart and soul of your candle. Opt for soy wax, beeswax, or good ol’ paraffin wax, depending on your preferences. We will dive into the different types more below.
- Wicks: The backbone of your candle’s flame. Make sure to choose wicks that are appropriate for the type and size of your candle.
- Containers: Give your candles a cozy home! Look for jars, tins, or even repurpose some vintage teacups for a touch of whimsy.
- Fragrance Oils or Essential Oils: Time to tickle your olfactory senses! Select scents that speak to your soul, whether it’s soothing lavender, invigorating citrus, or a delightful combination.
- Dyes or Colorants: Let your candles shine with vibrant hues! Choose liquid or solid colorants to add a splash of personality to your creations.
- Thermometer: Stay cool and collected with a handy thermometer to ensure the perfect temperature for your wax.
- Double Boiler or Melting Pot: Melt your wax like a pro! A double boiler or a melting pot will be your trusty companion during the melting process.
- Stirring Utensils: Give your wax a swirl! Grab some heat-resistant spoons or spatulas for mixing in fragrances and colors.
Safety Precautions to Consider
Ah, safety, our loyal sidekick in all our crafty endeavors. As we embark on this aromatic journey, let’s not forget to prioritize safety along the way. Here are a few precautions to keep in mind:
- Work in a well-ventilated area to prevent any unwanted fumes from overpowering your creative bliss.
- Always wear protective gear, such as heat-resistant gloves and goggles, to shield yourself from any potential mishaps.
- Keep a fire extinguisher nearby, just in case things get a little too fiery for comfort.
- Never leave melting wax unattended, because as much as we love candle flames, unattended flames are a big no-no.
- And, of course, read and follow the instructions provided with your supplies for specific safety guidelines and best practices.
Armed with the essential materials, knowledge of where to find them, and a commitment to safety, we’re well-prepared for our candle-making adventure! So, grab your shopping cart, put on your safety goggles, and let’s embark on a mission to turn wax and wicks into pure candle-making magic!
Different Types of Candle Wax
In this waxy wonderland, you’ll encounter a variety of wax options, each with its own unique characteristics. Let’s take a peek at some of the most popular ones:
Soy Wax
The eco-friendly superstar of the candle world! Made from soybean oil, this wax burns clean and has a longer-lasting flame. It’s perfect for those who prefer natural ingredients and a sustainable touch.
Pros: Eco-friendly, clean-burning, longer burn time, excellent scent throw, and easy cleanup.
Cons: Can be more expensive than other waxes, requires additional additives for stability in certain conditions.
Beeswax
Straight from the beehive, beeswax offers a warm, golden glow that exudes elegance. Known for its natural sweet scent, beeswax candles have a long burn time and emit a beautiful, natural light.
Pros: Natural and sustainable, emits a pleasant natural scent, longer burn time, emits a warm and cozy glow.
Cons: Higher cost, limited availability, can be tricky to work with due to its higher melting point.
Paraffin Wax
The classic choice that has stood the test of time! Paraffin wax is readily available, affordable, and easy to work with. It has a high fragrance-holding capacity, allowing for intense scent throw in your candles.
Pros: Widely available, affordable, great scent throw, versatile for various candle styles, easy to work with.
Cons: Derived from petroleum, may release soot or toxins if not properly formulated, limited eco-friendliness.
Coconut Wax
Embrace the tropical vibes with coconut wax! This wax is derived from coconuts and offers a smooth and creamy appearance. It blends well with other waxes, giving you the best of both worlds.
Pros: Renewable resource, clean-burning, good scent throw, smooth and creamy appearance, blends well with other waxes.
Cons: Can be pricier than other waxes, may have a softer texture that requires additional additives for stability.
Remember, the perfect wax for your candle depends on your preferences, budget, and desired outcome. Each wax type has its own charm and brings a unique character to your creations. So, explore the wax wonderland, follow your instincts, and choose the wax that speaks to your inner candle magician!
Different Container Options
Behold, a treasure trove of containers awaits your imaginative touch! Here are some enchanting options to consider:
- Jars: Classic, versatile, and oh-so-charming! Mason jars, glass jars, or even recycled food containers can provide a cozy home for your candles. Their transparent allure allows the mesmerizing glow to shine through, creating a captivating display.
- Tins: Compact and portable, tins are a fantastic choice for travel candles or adorable gift options. From whimsical patterns to sleek designs, these metal containers bring a touch of elegance and charm to your creations.
- Teacups and Crockery: Embark on a journey through vintage wonderland by repurposing teacups, saucers, or ceramic bowls. These whimsical vessels add a delightful touch of nostalgia and elegance to your candle-making adventures.
- Terracotta Pots: Unleash your creativity and go beyond traditional containers by exploring the world of terracotta pots. These rustic beauties bring a unique touch to your candles, creating a harmonious blend of nature and craftsmanship.
Factors to Consider When Choosing a Container
As you embark on your container quest, keep these essential factors in mind to ensure a match made in candle heaven:
- Size and Shape: Consider the size and shape of your container in relation to the amount of wax you’ll be using. You want to ensure a balanced ratio for optimal burn time and performance.
- Heat Resistance: Opt for containers that can withstand the heat generated by the burning candle. This ensures the safety and longevity of your candle, preventing any unwanted surprises.
- Aesthetics: Let your creative instincts soar as you select containers that complement your personal style and the intended ambiance. Whether it’s sleek and modern or vintage and whimsical, choose containers that bring joy to your heart.
- Compatibility with Wax: Different waxes may require specific container types. For example, soy wax may adhere better to glass containers, while beeswax may work well in ceramic vessels. Consider the compatibility between your chosen wax and the container material.
Recycling and Repurposing Containers for Candle-Making
Oh, the joys of recycling and repurposing! Give a second life to items that would otherwise be forgotten. From empty glass jars to teacups and even quirky trinkets, the world is your candle container oyster. Explore your creativity and scour thrift stores, flea markets, and your own cupboards for hidden gems just waiting to be transformed into candle homes. Not only will you create unique and eco-friendly candles, but you’ll also add a sprinkle of character and charm to your creations.
With a world of container options, essential factors to consider, and the thrill of recycling and repurposing, you’re ready to embark on a container quest like no other. So, gather your chosen vessels, ignite your imagination, and watch as your candles find their perfect homes. Let the container chronicles begin, and may your candle creations shine brightly in their newfound abodes!
Types of Fragrance Oils and Essential Oils
In this aromatic wonderland, you’ll encounter an array of fragrance oils and essential oils to add that extra oomph to your candles. Let’s take a whiff of what they have to offer:
- Fragrance Oils: These captivating concoctions come in a wide variety of scents, from fresh florals to cozy spices and everything in between. Each fragrance oil brings its own personality to your candles, allowing you to create an olfactory symphony that pleases the senses.
- Essential Oils: Harness the power of nature with essential oils derived from plants and botanicals. Lavender, eucalyptus, citrus, and many more options await, offering not only delightful scents but also potential therapeutic benefits.
Coloring Options for Homemade Candles
Now, let’s add a splash of vibrant color to our candle creations! Here are some options to brighten up your wax wonderland:
- Liquid Dyes: These concentrated colorants come in a rainbow of shades and are specifically formulated for candle-making. A few drops are all it takes to transform your wax into a kaleidoscope of colors.
- Dye Blocks or Chips: These solid colorants can be shaved or chopped to create desired hues. They offer versatility in blending and experimenting with different color combinations.
- Natural Colorants: For those who prefer a more nature-inspired palette, consider using natural colorants like powdered herbs, spices, or even dried flower petals. These can add unique tones and visual textures to your candles.
Candle Making Steps
Get ready, candle enthusiasts, for it’s time to dive into the enchanting steps of candle-making! Prepare to unleash your inner alchemist as we embark on a whimsical journey filled with melted wax, tantalizing scents, and vibrant colors. So, roll up your sleeves, don your imaginary wizard hat, and let the candle-making magic begin!
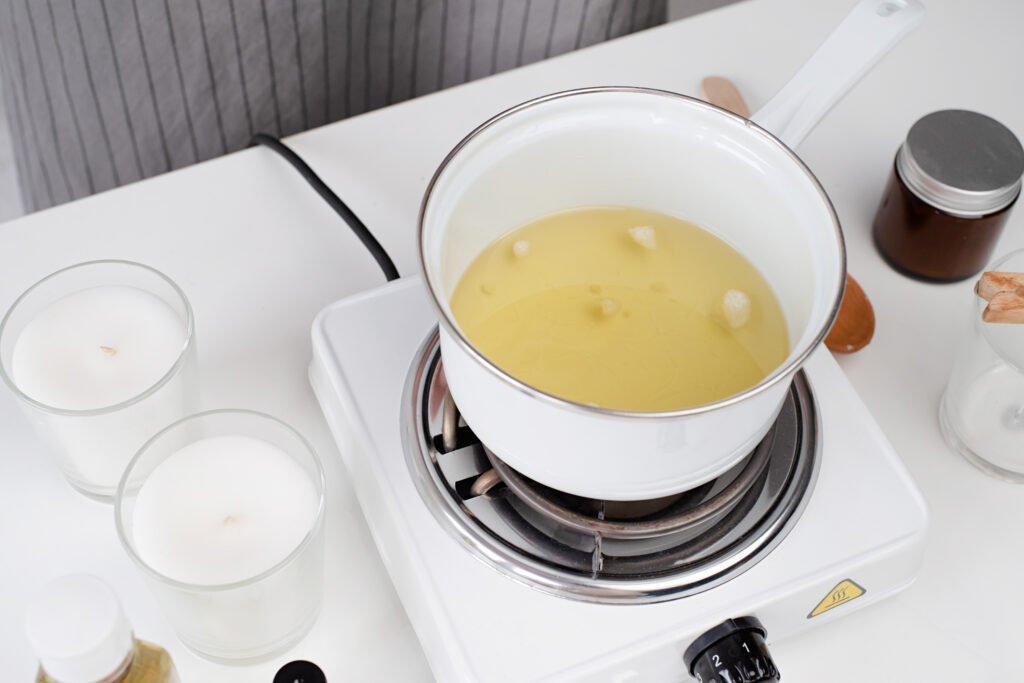
Melting the Wax
Our adventure commences with the alchemical process of melting the wax. Channel your inner potion master and follow these steps:
- Set up a double boiler or a melting pot: Fill the bottom pot with water and place it on the stove. Place the wax in the top pot or a heat-safe container, ensuring it fits snugly.
- Apply gentle heat: Gradually heat the water, allowing the wax to melt slowly and evenly. Stir occasionally with a heat-resistant spoon or spatula to promote even melting.
- Maintain the right temperature: Keep a watchful eye on the wax temperature, aiming for the range specified by your wax manufacturer. This ensures the wax is in its prime state for fragrance and color infusion.
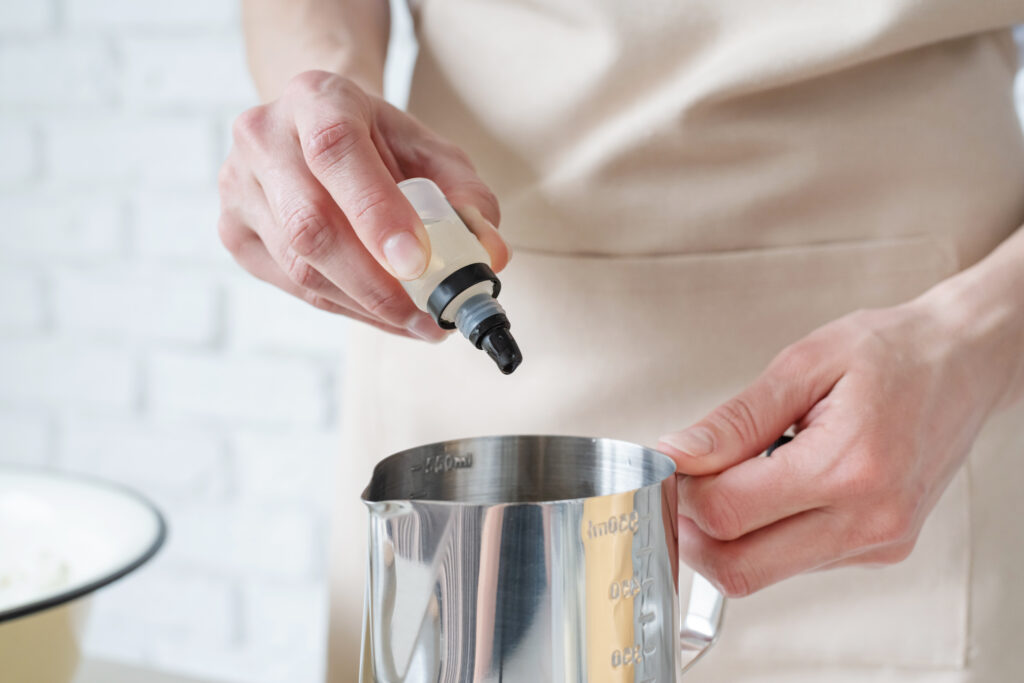
Adding Fragrance and Color
Now, it’s time to sprinkle your wax cauldron with captivating scents and hues! Here’s how to infuse fragrance and color into your molten creation:
- Fragrance fiesta: Remember our earlier fragrant escapade? Measure out the desired amount of fragrance oil or essential oil according to the manufacturer’s recommendations. Pour it into the melted wax and stir gently to ensure a fragrant symphony.
- Vibrant color extravaganza: Dip into your palette of color options and choose the hues that make your heart dance. Whether it’s liquid dyes, dye blocks, or natural colorants, add them to your wax, one drop or pinch at a time, until you achieve your desired shade. Stir well to disperse the color evenly throughout the wax.
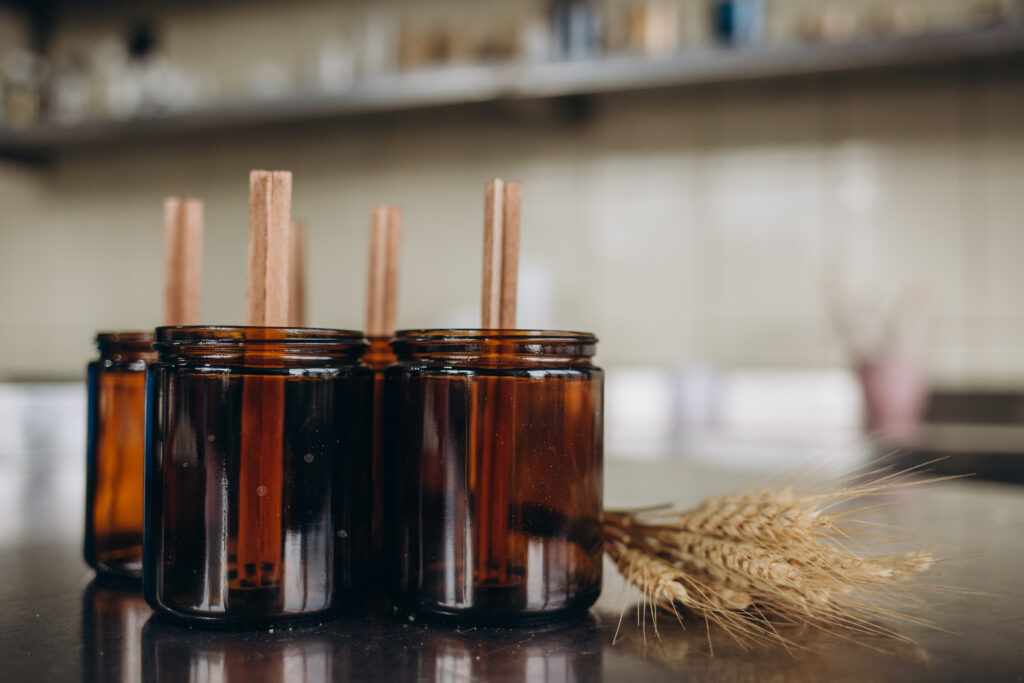
Preparing the Wick and Container
Now that your wax is infused with fragrance and color, let’s prepare the stage for your candle’s grand performance:
- Choose the wick: Select a wick that suits the size and type of your candle. Trim it to the appropriate length, leaving a bit of excess to anchor it in the container.
- Secure the wick: Attach the wick to the bottom of the container using a wick sticker, a dab of hot glue, or a wick sustainer. Ensure it is centered and straight, standing tall and proud.
Pouring the Wax into the Container
It’s showtime! Pour your molten masterpiece into its eagerly awaiting container:
- Hold steady: Carefully pour the wax into the container, ensuring a steady and controlled flow. Take your time to avoid spills or splashes.
- Mind the gap: Leave a small amount of space at the top of the container, usually around ½ inch to allow for proper cooling and to prevent the wax from overflowing.

Allowing the Candle to Cool and Set
Now, my patient candle creators, we must grant our candles some respite as they cool and solidify:
- Patience, young padawan: Allow your candle to cool and set undisturbed. This process typically takes several hours, so resist the urge to meddle.
- Embrace the magic: As the wax transforms from liquid to solid, behold the captivating metamorphosis. Watch the colors come to life, and the fragrance dances in the air.
Once your candle has fully cooled and set, trim the wick to a desired length, and voila! Your masterpiece is ready to cast its luminous spell, illuminating the world with your creative brilliance.
Common Candle-Making Problems and Solutions
In the magical realm of candle-making, even the most seasoned wizards can encounter a few hiccups. But fret not, for every problem has a solution. Let’s shed some light on common candle-making conundrums and how to wave our wands to fix them:
- Sinkholes: Oh no, the dreaded sinkholes! These depressions that form in the center of your candle can be frustrating. The solution? Try pouring your wax at a slightly higher temperature or use a heat gun to gently warm the surface and even it out.
- Tunneling: When your candle burns down the center, leaving a thick wall of unmelted wax, it’s time to summon the Tunneling Troubleshooters! To prevent this, ensure your wick is trimmed to the recommended length, and let your candle burn for a sufficient amount of time during each lighting session.
- Sooty Smokes: If your candle decides to perform an impromptu smoke show, fear not! Trim the wick to the correct length (about 1/4 inch) before each use and ensure your candle isn’t placed in a drafty area. This should extinguish any smoky shenanigans.
Tips for Achieving Desired Results
Now that we’ve tackled those pesky problems, let’s unleash some tips and tricks to help you achieve candle-making greatness:
- Measure twice, pour once: Accurate measurements are the key to candle-making success. Use a kitchen scale or measuring cup to ensure precise amounts of wax, fragrance, and color. Remember, precision is the path to perfection!
- Patience is a virtue: Candle-making is an art that requires a dash of patience. Allow your candles to cool and set completely before lighting them. This will ensure even burning and maximize their scent and aesthetic potential.
- Test, test, and test some more: Experimentation is the heart and soul of creativity! Test different fragrances, colors, and wicks to find the perfect combination that speaks to your soul. Don’t be afraid to embark on a journey of trial and error until you find your candle-making nirvana.
Creative Ideas for Customizing Homemade Candles
Now, let’s sprinkle some magic on your candle creations and unleash your inner creative genius! Here are some ideas to ignite your imagination:
- Wax Wonderland: Add layers of different colored wax to create mesmerizing gradient candles. Experiment with different color combinations and watch as your candles turn into vibrant works of art.
- Embossed Elegance: Make your candles stand out by using heat-resistant stamps or seals to emboss them with intricate designs. From whimsical patterns to personalized messages, let your creativity run wild.
- Nature’s Touch: Infuse your candles with natural elements like dried flowers, herbs, or even small decorative stones. Embed them in the wax or adorn the container’s surface for a touch of earthy enchantment.
- Rustic Chic: Wrap twine, burlap, or lace around your candle containers for a rustic and charming touch. Let the textures and materials transport you to a cozy cottage nestled in the woods.
Proper Candle Maintenance
Congratulations, oh mighty candle creator! You’ve birthed a marvelous masterpiece, and now it’s time to embrace the enchantment of candle care and usage. In this mystical realm, we shall explore the secrets of proper maintenance, safety guidelines, and even uncover ways to enhance the very essence of your candle-burning experience. So gather ’round, candle connoisseurs, and let the light guide us on this whimsical journey!
To ensure your candles burn bright and true, a touch of maintenance magic is required. Here’s how to keep your creations in tip-top shape:
- Trim those wicks: Before each lighting ceremony, trim the wick to about 1/4 inch. This keeps the flame at the ideal height, prevents excessive smoking, and ensures a clean and even burn. A well-groomed wick is a happy wick!
- Mind the wax pool: When you light your candle, allow the wax to melt and create a pool that reaches the edges of the container. This prevents tunneling and ensures an optimal burn. Remember, a happy wax pool leads to a happy candle!
Safety Guidelines When Burning Candles
While candles are a source of magic and ambiance, it’s important to wield their powers responsibly. Let’s summon the Candle Safety Guardians and follow these guidelines to ensure a safe and worry-free experience:
- Never leave them unattended: As tempting as it may be to frolic in the candlelit wonderland, always extinguish your candles before leaving the room or going to sleep. Safety first, my adventurous friend!
- Keep ’em away from flammable objects: Candles possess an enchanting glow, but they can also have a fiery personality. Keep them at least a few inches away from curtains, fabrics, books, or any other flammable items. No candle shall play with fire!
- Mind the drafts: Candles are sensitive beings, and they despise gusts of wind. Keep them away from drafty areas to prevent uneven burning and potential accidents. Let your candles bask in a peaceful, wind-free environment.
- Pets and tiny humans: If you have furry friends or little wizards in your midst, ensure they are kept at a safe distance from burning candles. We don’t want any curious paws or tiny hands getting too close to the magical flames.
Enhancing the Candle-Burning Experience
Now that we’ve mastered the art of candle maintenance and safety, let’s dive into the realm of elevated candle-burning experiences. Here are a few delightful ideas to take your candle encounters to the next level:
- Set the mood: Create a cozy ambiance by dimming the lights, playing soft music, or even indulging in a bubble bath. Let the flickering flames and fragrant whispers transport you to a realm of relaxation and tranquility.
- Aromatherapy bliss: Match your candle’s fragrance to your desired mood. Need a pick-me-up? Opt for invigorating citrus scents. Craving relaxation? Lavender and chamomile are your allies. Let the aromas guide your senses on a fragrant journey.
- Candlelight rituals: Incorporate candles into your self-care rituals or meditation practices. Light them with intention, focusing on your desires or setting positive affirmations. Allow the candle’s gentle glow to center your mind and soothe your spirit.
- Candle companions: Arrange your candles in clusters, creating a captivating display. Mix and match different sizes, shapes, and colors to create a symphony of enchantment. Let your candle companions shine together in harmony.
Recap of the Candle-Making Process
As we come to the end of our adventure, let’s take a moment to recap the steps we’ve taken:
- Melting the Wax: Transform solid wax into a molten elixir of creativity, heating it gently and patiently.
- Adding Fragrance and Color: Infuse your wax with scents that awaken the senses and colors that dance with delight, creating a symphony of beauty.
- Preparing the Wick and Container: Select the perfect wick, ensuring it stands tall and proud, ready to ignite the magic within your candle container.
- Pouring the Wax into the Container: With a steady hand and a touch of finesse, pour your molten masterpiece into its awaiting vessel, leaving room for dreams to blossom.
- Allowing the Candle to Cool and Set: Embrace the stillness and let time work its magic as your candle cools, solidifies, and becomes a beacon of light.
For those who are new to candle-making, let this be an invitation to dive into the enchanting world of DIY candles. Don’t be afraid to experiment, explore different scents and colors, and let your creativity take the lead. With a little practice and imagination, you’ll soon be creating candles that are truly one-of-a-kind.

In an effort to get them to avoid excessive screen time ( and arguing! ) I turned to more creative avenues that we have all since grown to love.
I created this website in the hopes of inspiring more families out there to enjoy crafting and enjoy a shared bonding experience over it.
Please enjoy it and hopefully, you’ll find something to make that you can display proudly forever!
- Master Crochet Stitches for Cozy Creations - January 23, 2024
- Half Double Crochet Guide for Cozy Creations - January 23, 2024
- Elevate Your Space with Unique Macrame Creations - January 23, 2024
