This blog explores the fascinating world of stitches per inch, understanding its importance and discovering how it affects the result of our knitting ventures. We’ll break down the connection between
From thick blankets to provide us with comforting warmth to thin lace shawls to drape our shoulders, the number of stitches per inch is a key factor in achieving the desired fabric drape, fit, and look. Let’s come together and unlock the secrets of this basic part of knitting and increase our expertise as craftspeople.
Come with us as we explore the complexities of stitch gauge, learn the secrets to getting even tension, and find out how to tailor patterns to suit our personal stitching preferences. Whether you desire to work on heirloom garments, accessories, or just enjoy the calming rhythm of knitting, comprehending stitches per inch will improve your craftsmanship to higher heights.
Are you ready to go on a knitting journey that will transform your projects? Let’s dive in and unravel the magic of stitches per inch together!
Understanding Stitches Per Inch (spi)
Stitches per inch and its significance in knitting
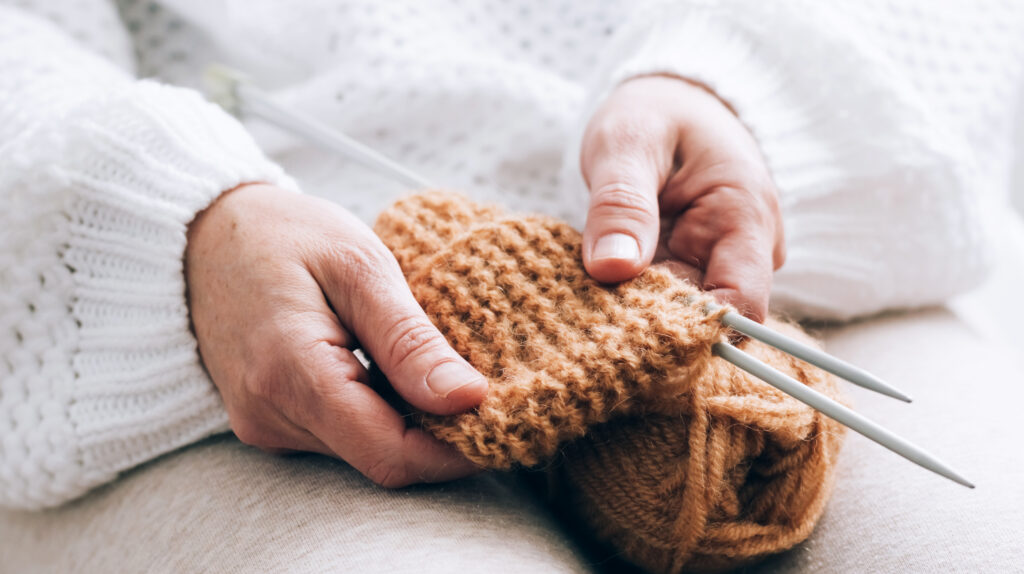
Stitches per inch (spi) refers to the number of stitches knitted within a one-inch span. It is a fundamental measurement that plays a crucial role in the outcome of knitting projects. Spi determines the density of the knitted fabric and directly impacts its characteristics, such as drape, fit, and overall appearance. Achieving the correct spi is essential for ensuring that the finished item matches the intended size and design.
Affects on fabric drape, fit, and overall appearance of knitted items
The spi of a knitted piece affects its fabric properties in significant ways. A higher spi, where more stitches are packed into an inch, creates a denser fabric with less stretch. This denseness can result in a stiffer drape and a tighter fit. Conversely, a lower spi, with fewer stitches per inch, produces a more open and flexible fabric that drapes loosely and provides a relaxed fit.
Additionally, spi influences the overall appearance of knitted items. A high spi can showcase intricate stitch patterns with more clarity, emphasizing fine details. On the other hand, a lower spi can enhance the texture of bulky yarns, creating a chunkier and more visually pronounced fabric.

The relationship between yarn weight, needle size, and spi
The relationship between
- Yarn Weight:
Yarn weight refers to the thickness of theyarn . Differentyarn weights have different typical spi ranges. Generally, bulky or thicker yarns result in fewer stitches per inch, while finer yarns yield more stitches per inch. When selectingyarn , consider the spi range recommended for theyarn weight and the desired outcome of your project. - Needle Size: The needle size used in knitting also influences spi. Larger needles create more space between stitches, resulting in a lower spi. Conversely, smaller needles produce tighter stitches and a higher spi. It’s essential to match the needle size with the
yarn weight to achieve the desired spi and fabric characteristics.
To find the right spi for your project, consider the recommended spi range for the
By understanding the relationship between
Factors Influencing Stitches Per Inch
Yarn Weight and Choosing the Appropriate Yarn for Desired spi:
Yarn weight plays a significant role in determining the stitches per inch (spi) in knitting. Different
Yarn Weight | Typical spi Range
- Super Bulky/Chunky | 1-2 spi
- Bulky | 2-3 spi
- Worsted/Aran | 4-5 spi
- DK/Light Worsted | 5-6 spi
- Sport | 6-7 spi
- Fingering/Sock | 7-8 spi
To select the appropriate
Impact of Needle Size on spi and Guidelines for Choosing the Right Needle Size:
In knitting, needle size directly affects spi. Larger needles create more space between stitches, resulting in fewer stitches per inch. Smaller needles, on the other hand, produce tighter stitches, resulting in a higher spi. To achieve the desired spi, it’s important to choose the right needle size for your
Here are some general guidelines to help you select the appropriate needle size:
- Yarn Label Recommendations: Check the
yarn label for recommended needle size information.Yarn manufacturers often provide suggested needle sizes to achieve the best spi for theiryarn . Consider these recommendations as a starting point. - Swatching: Swatching is an essential technique to determine the spi for your project. Start by knitting a small sample using the
yarn and needle size you intend to use. Measure the spi in your swatch and compare it to the desired spi for your project. If the spi is too loose, try using a smaller needle size, and if it’s too tight, switch to a larger needle size. - Personal Tension: Individual knitting tension can vary. Some knitters naturally knit looser, while others knit tighter. Take your personal tension into account when choosing needle sizes. If you tend to knit tightly, consider using larger needles to achieve the desired spi. Conversely, if you knit loosely, opt for smaller needles.
- Pattern Recommendations: If you’re working from a pattern, check if it provides a specific gauge or spi requirement. Follow the pattern’s needle size recommendations to ensure your finished project matches the intended size and fit.
Remember that spi is not set in stone and can vary depending on your personal knitting style and the effect you want to achieve. Swatching and experimenting with needle sizes will help you find the perfect balance to achieve the desired spi for your knitting projects.
Achieving Consistent Tension
Consistent tension is crucial in knitting, especially when aiming for accurate stitches per inch (spi). Maintaining a consistent tension throughout your project ensures that each stitch is of the same size and contributes to an even fabric.
Importance of Consistent Tension in Achieving Accurate spi
- Uniform Fabric: Consistent tension ensures that all stitches are the same size, resulting in a uniform fabric. This is vital when striving for an even spi, as any variations in tension can lead to inconsistencies in stitch size and disrupt the desired fabric density.
- Sizing and Fit: Inaccurate spi due to inconsistent tension can affect the size and fit of your knitted item. If some areas have a tighter spi while others are looser, it can result in misshapen or ill-fitting garments.
- Pattern Accuracy: Following a pattern’s spi is crucial to achieve the intended design and size. Inconsistent tension can throw off the gauge and spi, potentially altering the measurements and proportions specified in the pattern.
Tips and Techniques for Maintaining Consistent Tension:
- Relax and Breathe: Begin your knitting session by taking a few deep breaths to relax. Tension can often stem from stress or holding the
yarn too tightly. By consciously relaxing your grip and maintaining a calm mindset, you can improve your overall tension control. - Practice Consistency: Consistency comes with practice. Spend time knitting swatches or small projects to refine your tension. Focus on maintaining an even tension throughout, keeping the stitches uniform in size.
- Hand Positioning: Pay attention to your hand positioning while knitting. Find a comfortable grip that allows for controlled movement and consistent
yarn tension. Experiment with different hand positions until you find what works best for you. - Yarn Tensioning: Develop a
yarn tensioning technique that suits your style. You can wrap theyarn around your fingers, use ayarn guide, or employ other methods that provide controlled tension. Find a technique that allows theyarn to flow smoothly through your fingers without being too loose or too tight. - Regular Monitoring: Continuously monitor your tension as you knit. Regularly check your stitches to ensure they are of consistent size and tension. Make adjustments as needed to maintain uniformity.
Challenges with Tension and How to Overcome Them:
- Tight Tension: If you tend to knit too tightly, consciously relax your grip on the
yarn . You can also try using larger needles or switching to a looser tensioning technique to achieve a more even stitch size. - Loose Tension: For those who knit too loosely, consider using smaller needles or adopting a firmer tensioning method. Practice keeping a consistent grip on the
yarn to prevent overly loose stitches. - Varied Tension: If you notice variations in tension within your knitting, identify the areas where the tension differs. Slow down and focus on those sections, ensuring you maintain a consistent tension throughout.
- Blocking: If you find that your tension varies despite your efforts, blocking the finished piece can help even out the stitches. Wet blocking or steam blocking can help relax or tighten the fabric, making the tension inconsistencies less noticeable.
Remember, achieving consistent tension takes time and practice. Don’t be discouraged by occasional variations in your tension; it’s part of the learning process. With patience and persistence, you’ll develop the ability to maintain a consistent tension, leading to accurate spi and beautifully knitted projects.
Adapting Patterns to Achieve Desired spi
Knitting patterns often provide a recommended stitches per inch (spi) or gauge to ensure the intended size and fit of the finished project. However, you may sometimes want to modify the spi to suit your preferences or to accommodate different
Here’s a guide on how to adjust spi in knitting patterns
- Understand the Pattern’s Original spi: Start by checking the pattern for the recommended spi or gauge. This information is usually provided in the pattern instructions and is typically measured over a 4×4-inch (10×10 cm) swatch.
- Swatch with Your
Yarn and Needles: Using theyarn and needles you plan to use for the project, knit a swatch that matches the stitch pattern specified in the pattern. Ensure the swatch is large enough to accurately measure spi. - Measure Your Swatch’s spi: Lay the swatch flat and measure the number of stitches per inch horizontally and vertically. Count the stitches across a 1-inch span and write down the result for both the horizontal and vertical measurements. This will be your actual spi.
- Compare Actual spi with Pattern’s spi: Compare your actual spi to the recommended spi in the pattern. If your actual spi matches the pattern’s spi, you can proceed with the pattern as written. If there are differences, you’ll need to adjust accordingly.
Modifying Stitch Counts and Needle Sizes:
To increase or decrease the spi, you can adjust the stitch counts or needle sizes. Here’s how:
- Increasing spi: If your actual spi is smaller than the pattern’s spi, you’ll need to increase spi. To do this, you can:
- Use smaller needles: Switch to a smaller needle size to tighten up the stitches and increase spi.
- Decrease stitch count: Work fewer stitches in each row or round by modifying the pattern instructions. This could involve reducing the number of cast-on stitches or decreasing the stitch count within the pattern repeat.
- Decreasing spi: If your actual spi is larger than the pattern’s spi, you’ll need to decrease spi. To achieve this, you can:
- Use larger needles: Switch to a larger needle size to create bigger stitches and decrease spi.
- Increase stitch count: Work more stitches in each row or round by modifying the pattern instructions. This might involve adding extra stitches during cast-on or increasing the stitch count within the pattern repeat.
Tips on Calculating spi for Personalized Projects:
When working on personalized projects or designing your own patterns, calculating spi becomes essential. Here are a few tips to help you calculate spi accurately:
- Swatch with Your Chosen
Yarn and Needles: Always swatch with the exactyarn and needles you plan to use for your project. This ensures that the spi measurement is specific to your chosen materials. - Measure spi Across Multiple Swatches: To obtain a more accurate spi measurement, knit and measure multiple swatches. This helps account for any variations in tension or inconsistencies that may occur within individual swatches.
- Take Averaged Measurements: If you swatch multiple times, calculate the average spi across all your swatches. This helps reduce the impact of any outliers and provides a more reliable spi measurement.
- Keep Detailed Notes: Document the
yarn , needle size, and stitch pattern used in your swatch, along with the resulting spi measurement. This information will be valuable when adapting patterns or creating personalized projects in the future.
By understanding how to modify stitch counts and needle sizes and by calculating spi accurately, you can confidently adapt knitting patterns or create personalized projects that suit your desired spi and achieve the perfect fabric density and fit.
Practice and Experimentation
Mastering stitches per inch (spi) in knitting requires practice and experimentation. By dedicating time to practice and exploring different combinations of yarns, needle sizes, and stitch patterns, you can gain a deeper understanding of how spi affects the fabric and refine your skills. Here’s why practice and experimentation are important and some resources for further learning and inspiration:
Importance of Practice in Mastering spi
- Tension Control: Achieving consistent tension is key to obtaining accurate spi. Practice helps you develop muscle memory and fine-tune your knitting technique, leading to better tension control.
- Confidence Building: Regular practice builds confidence and familiarity with different yarns, needle sizes, and stitch patterns. As you become more comfortable, you’ll be able to adapt patterns and experiment with spi to achieve the desired results.
- Problem-Solving Skills: Practice exposes you to different challenges and allows you to develop problem-solving skills. You’ll learn how to troubleshoot tension issues, adjust stitch counts, and select the appropriate needle sizes to achieve the desired spi.
Experimenting with Different Yarns, Needle Sizes, and Stitch Patterns
- Yarns: Experiment with yarns of different weights and fiber compositions. Notice how the spi varies with different yarns. Thicker yarns generally result in lower spi, while finer yarns yield higher spi. Play with yarns made of different fibers to observe how they affect the fabric characteristics.
- Needle Sizes: Explore the impact of needle sizes on spi. Try knitting with different needle sizes and observe the differences in fabric density and drape. Larger needles create a looser fabric with lower spi, while smaller needles result in tighter stitches and higher spi.
- Stitch Patterns: Experiment with different stitch patterns to see how they influence spi. Intricate stitch patterns may require larger needles to maintain an appropriate spi, while simpler stitch patterns may result in tighter fabric. Notice how spi can vary within the same project when transitioning between stitch patterns.
Resources for Further Learning and Inspiration
- Knitting Books: Explore knitting books that focus on techniques, stitch patterns, and pattern modification. Some recommended titles include “The Principles of Knitting” by June Hemmons Hiatt and “The Knitter’s Book of Knowledge” by Debbie Bliss.
- Online Tutorials and Courses: Take advantage of online resources like video tutorials and online knitting courses. Websites like Craftsy, Knitfreedom, JanesKnittingKits and KnittingHelp offer a variety of classes and tutorials on knitting techniques and pattern modifications.
- Knitting Communities and Forums: Engage with knitting communities and forums to learn from experienced knitters and seek advice. Ravelry is a popular online platform where you can find patterns, join groups, and participate in discussions.
- Local Knitting Groups: Look for local knitting groups or
yarn shops that offer workshops or knitting circles. Participating in these gatherings allows you to learn from others, share experiences, and gain inspiration.

|

|
|
$34.66
|
$42.50
|
Remember, practice and experimentation are ongoing processes in knitting. Embrace the journey of discovering the endless possibilities of spi variations and enjoy the creative freedom it offers. With time, patience, and a willingness to explore, you’ll develop a deeper understanding of spi and enhance your knitting skills.
Video Instructions
FAQ
How Do You Figure Out How Many Stitches Per Inch?
To figure out the stitches per inch (spi), create a 4×4 inch swatch using the yarn and needle size specified in the pattern. Count the number of stitches horizontally and vertically within a 1-inch section of the swatch. This measurement will give you the spi. Compare it to the recommended spi in the pattern to determine if any adjustments are needed in stitch count or needle size.
If you’re still having trouble getting an accurate measurement, there are also a few online tools that can help you out. YarnSub is a great resource for finding information on substituting yarns – including stitch gauges. Another helpful site is Knitting Help, which has a handy calculator for figuring out stitch gauges based on needle size and yarn type.
How Many Stitches For A 6-Inch Knitted Square?
The number of stitches for a 6-inch knitted square will depend on your stitches per inch (spi). To calculate the number of stitches needed, multiply your spi by 6. For example, if your spi is 5 stitches per inch, you would need 30 stitches (5 spi x 6 inches) to create a 6-inch knitted square.
How Do I Know How Many Cast On Stitches I Need?
To determine the number of cast-on stitches needed for your knitting project, refer to the pattern instructions if available. Alternatively, you can calculate the approximate count by knitting a gauge swatch and measuring the stitches per inch (spi). Multiply the desired width of your project by the spi to estimate the cast-on stitch count. Keep in mind that these are approximate values, and it’s recommended to make a gauge swatch for accuracy.
What If I Have Too Many Stitches Per Inch?
Use larger needle size to create larger stitches and loosen the fabric.
Adjust your tension to create slightly larger stitches.
Decrease the number of cast-on stitches if necessary.
Consider using a thicker yarn to naturally decrease the spi. Remember to make a new gauge swatch to check if the spi has improved after implementing these adjustments.
Conclusion
Understanding stitches per inch (spi) is a valuable skill in knitting that allows you to control fabric density, achieve the desired fit, and bring your creative vision to life. Throughout this discussion, we’ve explored the significance of spi, factors influencing it, and how to adapt patterns to achieve the desired spi. We’ve also emphasized the importance of practice, experimentation, and continuous learning in mastering spi.
Consistent tension, achieved through practice, plays a vital role in achieving accurate spi. By practicing regularly and focusing on maintaining even tension, you can create uniform stitches and fabric. Additionally, experimenting with different
Modifying stitch counts and needle sizes provides you with the flexibility to customize spi to suit your preferences and project requirements. By adjusting these factors, you can achieve the desired fabric density and ensure that your finished item fits perfectly.
As you delve further into the world of knitting, there are numerous resources available to support your learning and inspire your creativity. Knitting books, online tutorials, courses, knitting communities, and local knitting groups offer valuable insights, techniques, and opportunities for collaboration.
Remember that spi is not an exact science and may vary depending on individual knitting style and project specifications. Embrace the journey of discovery, embrace the occasional challenges, and view them as opportunities to refine your skills and deepen your understanding.
So, grab your

In an effort to get them to avoid excessive screen time ( and arguing! ) I turned to more creative avenues that we have all since grown to love.
I created this website in the hopes of inspiring more families out there to enjoy crafting and enjoy a shared bonding experience over it.
Please enjoy it and hopefully, you’ll find something to make that you can display proudly forever!
- Master Crochet Stitches for Cozy Creations - January 23, 2024
- Half Double Crochet Guide for Cozy Creations - January 23, 2024
- Elevate Your Space with Unique Macrame Creations - January 23, 2024
