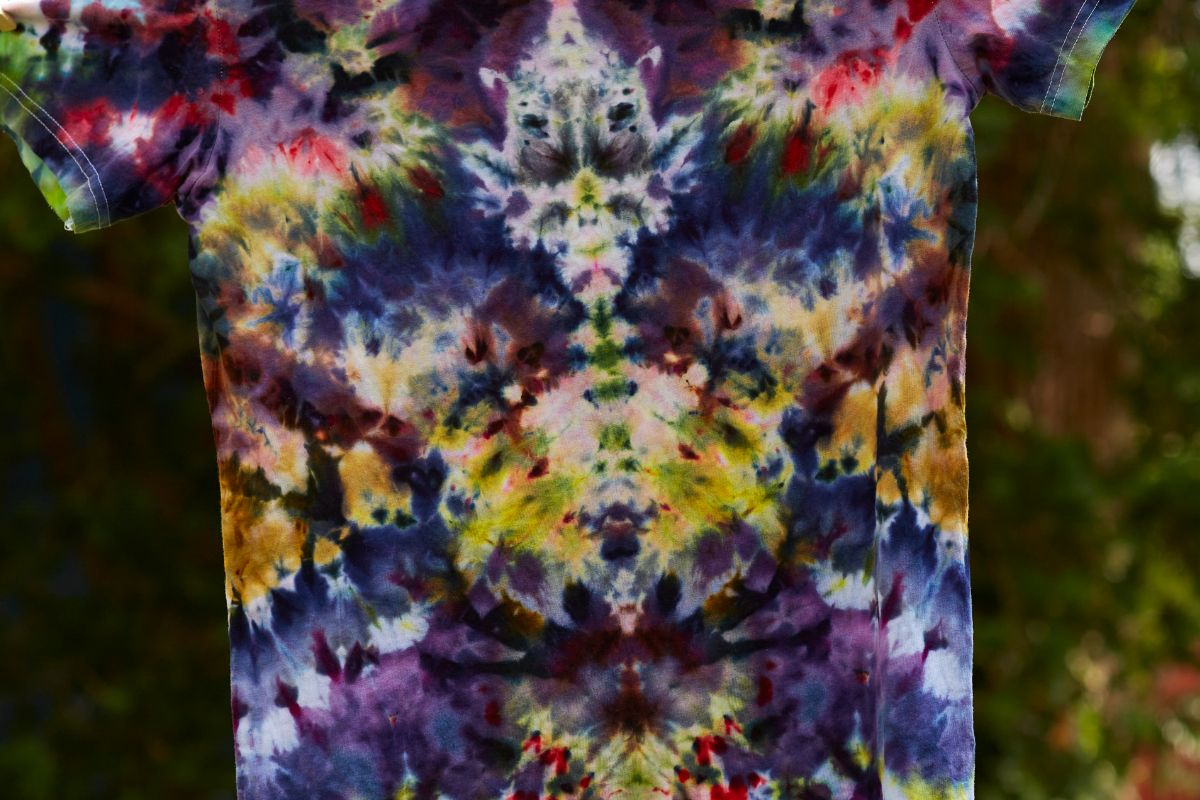
If you want a mixture of whimsy and mystique this Halloween, you could make some tie-dye shirts, which look amazing when you mix in a palette and get some fascinating shapes where you can get lost in their allure.

The best thing about these is that you don’t have to start with many items, and many of them you can find lying around your home. You can make the rest however you like, which is perfect for the family to get involved with.
Read on to find out how easy these are and how you can make them even more unique.
Get All The Materials
You want to start with a plain white shirt that you can wash in hot water and dry thoroughly, so it’s easier to work with. If you want the dye to have a better finish that doesn’t look too run, you can soak it in a soda ash solution for 20 minutes.
Then you can spin dry the shirt and get a fresh garment, so you can start preparing your dyes here. Here you can either get a premade dye pack or you can get a few of your own colors to work with.
If you’re stuck on colors, you can find a color picker to find the specific color you need to mix up with different shirts. With these, you’ll need some plastic wrap, rubber bands or ties, washable markers, tie-dye templates, and some paper towels for cleanup.
Prepare The Shirt
Here is a fun part: you can use your Halloween template and draw it on your shirt. But before you do this, you need to prepare the shirt by folding it in half and drawing half the design on the slides, where you need to tuck the design into the shirt.
If you have a complicated design, it may be a good idea to sew it into the design as it’s inside out, so when the dye soaks through, it doesn’t get caught on the cardboard designs.
If you’ve centered it right, you can secure the fold with a rubber tie or band, and here is where you can fold and scrunch the shirt parts that aren’t tied while keeping it all flat.
Add The Coloring
From there, you’ll have marked sections of your shirt, and you can add the dye to these accordingly. Be sure to add one color to one side to avoid any running colors that could ruin the palette on the shirt.
You can add another layer to the side you’ve dyed, so you want to ensure that this is lying on an old sheet or blanket, as this will run off and spoil your clothes. Once you’ve done the other side, you want to repeat this until the shirt fully absorbs the dye.
Let The Dye Set
For this, you have two options, the first is that you can put it in the microwave for about 3 minutes in a container, or you can wrap it in plastic and let it dry out for 24 hours. This is so you get a more vibrant color on your shirt, and it doesn’t fade as quickly.
When you’ve let it dry, you want to run some water over it for a minute or two to get any excess dye still on there, which could cause problems.
You can scrunch these up and get lots of different patterns, so if you don’t get it right the first time, you can start over and try a different color to suit your next project. The fun with this is knowing that there are so many designs and directions you can go with these.
Not Happy With Your Design?
Now you have the result, you may not be happy with your tie-dye, and if so, you can make some changes to get a design that you can be pleased with and that suits your style and needs. How about you try some of our ideas?
Are You Bored Of Templates?
Perhaps you or the family could be happier with the result, and you want to try stick-on or ironed designs that can save you a lot of work. You could try these self-adhesive ghost shapes or transfer designs worth looking at.
The key here is to go for something you both like, which has a nice twist, as you might have other plans for your tie-dye. You can buy a set and use them in different places, so if you’re decorating your home for the occasion, you’ll fit in well with these.
The possibilities here are almost endless, as you could even go as far as making your transfers of stickers, which will look great in your home and blend in well with whatever theme you have going on.
If Spooky Isn’t What You’re Looking For
You might want something that has a specific color, so here is where tutorials can help you out, as you can get professional-looking shirts that are relatively easy to create.
You can see fun ones with multiple patterns in them, and these you’ll find can be as simple or as intricate as you can imagine. When it comes to the drawn or sown image, there isn’t really a limit on the size, as this can illuminate your tie dye even more.
You can do this for items other than shirts, so you could try your hand at dyeing socks, laces, bandanas, or even buntings that you could hang up and display to all. Not everyone will like this, but this is an idea of what’s possible here.
If You Like Sewing
Here is where you can have more control over your tie dye, as you can draw and stitch a design that can be separated as soon as the coloring is added to the shirt. This may sound complicated, but it doesn’t need to be and can be a way to learn a new skill.
Once you have your outline, you want to get a roll of thread and a needle, then double thread it, as it needs to be quite strong when you go to tie and pull on the section. This is why you want a noticeably big knot to act as an anchor at the end.
To start, you want to make your first stitch as close to the edge of the fabric as possible, and you want to make these running stitches on the line. You want to make wide-open stitches as this makes them easier to gather up in the end.
If you follow this, you should get a bunched-up center, and here you want to adjust both ends of the thread and bind the shape together. Once you’ve done this, you can add a band or tie, which keeps your shape intact and ready for dyeing.
Frequently Asked Questions
How Do I Wash Tie Dye Shirts?
When you start the first wash of your tie dye, you might be concerned that the color will run, but this is normal and happens during the first few washes. It would help if you rinsed the shirt before putting it in the washing machine.
If you want to avoid staining other colors of your clothes, it’s best to keep these loads small and wash items of a similar color. You can set the temperature to hot and use a dye-safe detergent, but you want to avoid using fabric softener.
Once you’ve done this with your light and dark colors, you should be able to mix these with your regular clothes, as the excess color should have come out during these first few cycles.
How Do I Keep The White Areas Of The Shirt?
For the best results, it may be a good idea to use fiber-reactive dyes, as these will set better and prevent colors from running too far. Once you’ve added the dyes, you want to wait for a day before you unwind and try to rinse off the shirt.
Once you’ve done that, you can rinse it in cold water, then wash it in a hot cycle, which will take two rounds to remove the excess dye. If you want to prevent the colors from fading, you can put it on low heat or air dry it for the long term.
The Bottom Line
Now you have an idea of how these dazzling shirts are made, you can make a few test patches and see what you come up with. It’s a good chance that you can make something that won’t just be worn once.
Part of the experience here is meant to be fun, so don’t be too put off if you find your design hasn’t come out as you expected. It is very true when they say that these designs can be hard to replicate, as they can come out quite differently.

In an effort to get them to avoid excessive screen time ( and arguing! ) I turned to more creative avenues that we have all since grown to love.
I created this website in the hopes of inspiring more families out there to enjoy crafting and enjoy a shared bonding experience over it.
Please enjoy it and hopefully, you’ll find something to make that you can display proudly forever!
- Master Crochet Stitches for Cozy Creations - January 23, 2024
- Half Double Crochet Guide for Cozy Creations - January 23, 2024
- Elevate Your Space with Unique Macrame Creations - January 23, 2024
