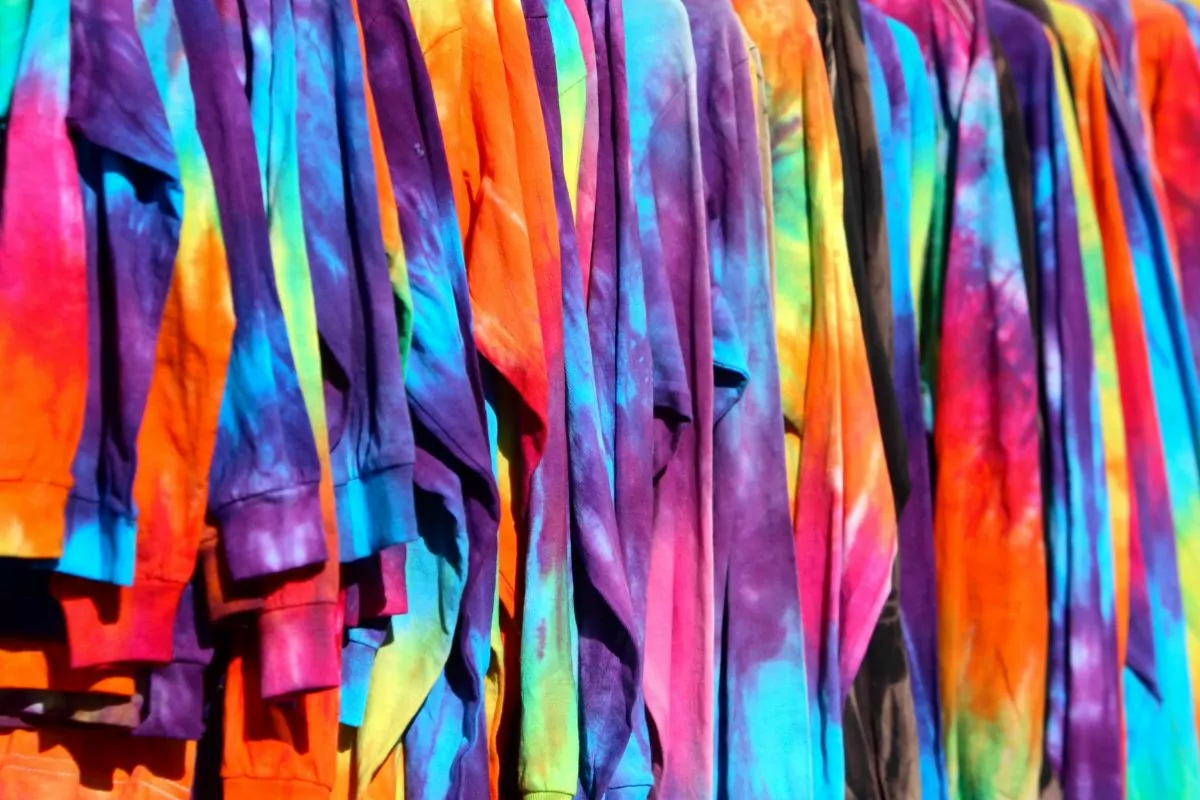
Tie dye clothing was super popular in the 70s, and now it’s making the ultimate comeback! This retro style looks so cool and it’s a really easy craft to do at home! From t-shirts and vests to socks and bags, the possibilities are endless when it comes to tie dye.
A great way to gently sport the tie dye trend while remaining absolutely funky is to dye with pale brights. To help you get started, we’ve put together this guide on how to make your very own pastel tie dye clothes.
We’ll tell you everything you need to know, including the different patterns you can try, and some amazing ideas to inspire your first project/
What You’ll Need?
Before you begin, you’ll need a few supplies and, of course, a piece of clothing to dye! You have plenty of options to choose from, but for the best results, you should choose something that is made of 100% natural fibers, like linen or cotton.
50% blends might work, but 100% synthetic material, like polyester, won’t absorb the dye. You’ll also need a tie dye powder scoop, squeeze bottle, and dye in colors of your choice!
You’re free to get these items separately, but you should be able to find a handy tie dye kit, where you’ll get all of these supplies in one package.
The other supplies you’ll need are water, paper towels, rubber bands, Ziplock bags, gloves, a drying rack, an apron, and a plastic tablecloth Most of these things can be found around your home, but if not, your local Walmart should have everything you need.
To recap, you will need:
- Item you want to tie dye
- 1.25 ml tie dye powder scoop or 1/4 teaspoon
- 4 oz squeeze bottles
- Dye in the colors of your choice
- Water
- Paper towels
- Rubber bands
- Ziplock bags
- Gloves
- Drying rack
- Apron
- Plastic tablecloth
How To Make Pastel Tie Dye Clothes?
Now that you have all your supplies, it’s time to start tie dyeing! Prepare your area and follow our detailed instructions below.
Mixing Your Dye
When combining dye powder with water, the secret to creating lovely pastel dye is to use a very little amount. A 1.25 ml scoop for the tie dye powder will make measuring simple, but a 1/4 teaspoon, which is the same size as the scoop, can also be used.
If you want to make the color slightly darker, you can go ahead and use a full scoop instead. To make pastel versions of bright colors, all you need to do is use 1/2 a scoop in your 4 oz squeeze bottle.
You can also mix different dyes together for different colors! But we’ll talk about that more later in the article.
Tying
Next, you’ll have to decide what kind of pattern you want to create. There are so many different tying techniques out there, so choose your favorite from our list below and tie your piece of clothing according to the instructions, using rubber bands to keep everything together.
Applying The Dye
Once you’ve chosen your pattern and tied the clothing up, you can start dyeing! Start by covering your surface with a plastic tablecloth to avoid staining. Then, put on your gloves and lay out paper towels with your drying rack on top.
Our best advice is to consider how the colors will blend when put next to one another when deciding which dye colors to use together. When using complementary or opposite hues, you should exercise more caution.
Make sure to leave some white space between any colors that could blend when placed near to one another so that the colors can bleed without merging.
In the tie dye patterns below, you’ll find how to apply the dye to get your desired pattern. Just follow those instructions to complete this step.
Soaking
Now that you’ve applied the dye, place your item in a Ziplock bag and let the piece of clothing soak. For full color intensity, you should let the item soak for around 8 to 24 hours. However, if you’d rather the end result be a paler color, let it sit for 1 to 4 hours.
Rinsing And Washing
When your item has finished soaking, rinse it to remove the excess dye. Put your gloves on, then wash the piece of clothing in warm water until the water runs clear. Then, you have a choice between washing your item by hand or by machine.
Hand washing and air drying are recommended for more fragile clothes or products whose dye you want to remain exceptionally vivid. You can wash casual items like cotton t-shirts in the washing machine.
It should be washed separately on warm with some mild detergent and dried normally.
Mixing Pastel Tie Dye Colors
As we’ve previously mentioned, 1 scoop or 1/2 scoop of dye will give you a nice diluted dye that will turn into a pastel shade once your project is finished. However, for colors you don’t have, you’ll have to mix two dyes together to get the color you want.
If you plan on mixing new colors, it’s a good idea to have the following dyes on hand. These are the colors that usually come in a good tie dye kit:
- Fuchsia
- Red
- Orange
- Yellow
- Green
- Blue
- Turquoise
- Purple
- Black
Once you have these colors, you can start mixing! Here are some pastel color recipes you can create using your basic dyes:
- Light watermelon pink – 1 scoop of fuchsia and 1 scoop of orange
- Light golden yellow – 1/2 scoop of fuchsia and 2 scoops of yellow
- Chartreuse – 1/4 scoop of green and 2 scoops of yellow
- Spearmint – 1 scoop of yellow and 1 scoop of turquoise
- Light royal blue – 1 scoop of turquoise and 1 scoop of purple
- Light navy blue – 1 scoop of blue and 1 scoop of black
- Indigo – 1/2 scoop of turquoise, 1/2 scoop of blue and 1 scoop of purple
- Violet – 1 scoop of blue and 1 scoop of purple.
Tie Dye Patterns
As we’ve said before, there are so many tie dye patterns to choose from, all of which will give you some amazing results! Take a look at our top picks for your first pastel tie dye project.
Crumple
- Lay your shirt flat on a surface and scrunch small sections of the fabric together at random.
- Continue to scrunch and fold the fabric as you gather it into a flat, tight disk.
- Wrap the disk of fabric with several rubber bands. Keep in mind that the tighter you scrunch the fabric, the more white will appear in the final product.
- Apply the dyes until the disk is completely covered.
Spiral
- Start by squeezing a small area of the shirt’s center. Hold onto that piece and turn the shirt in a clockwise direction.
- To ensure that the spiral stays flat, keep twisting while keeping your fingertips near to the table’s surface. The shirt will fold in on itself as you twist.
- Secure the shirt with 3 or 4 rubber bands, crossing them over the center of the disc. The shirt will have more white patches the more tightly you bind it.
- Apply a different shade of dye to each “wedge” the intertwined rubber bands have formed.
Vertical Stripes
- Flatten the shirt out. The shirt should be folded in a series of 1-inch accordion folds beginning at the bottom hem. As if making a paper fan, alternate the directions of the folds.
- Every 1 to 2 inches, wrap a rubber band around the folded shirt to secure it.
- Apply different dye colors in alternate portions to create stripes.
Horizontal Stripes
- Flatten the shirt out. The garment should be folded in a series of 1-inch accordion folds, beginning with the left sleeve. As if building a paper fan, alternate the directions of the folds.
- Every 1 to 2 inches, wrap a rubber band around the folded shirt to secure it.
- Apply different dye colors in alternate portions to create stripes.
Diagonal Stripes
- Flatten the shirt out. Fold the garment into an accordion shape starting with the bottom-left corner. As if building a paper fan, alternate the directions of the folds. It can be a little challenging to fold the left sleeve, but try to keep it parallel to the other folds.
- Every 1 to 2 inches, wrap a rubber band around the folded shirt to secure it.
- Apply different dye colors in alternate portions to create stripes.
Sunburst
- On a table, lay the shirt flat. To form a little pointed cone shape, pinch a small piece of fabric and draw it up.
- About half an inch to an inch down from the cone’s point, wrap a rubber band around the fabric cone.
- Repeat this step again, pinching a new tiny piece of fabric to form a new cone. Apply a rubber band to secure it.
- Create as many sunbursts as you like, and then dye the background 1 or 2 different colors.
Bullseye
- On a table, lay the shirt flat. At the shirt’s middle, pinch a small portion of the fabric. Select a small area off-center if you want the bullseye to be off-center.
- In order to form a narrow cone, pull the cloth that was pinched up to a point and smooth the rest of the shirt down.
- Starting about an inch below the cone’s point, wrap rubber bands around the cloth cone. You can add as many or as few rubber bands as you like.
- Alternately apply different dye colors to make the rings.
Heart
- The shirt should first be laid flat. Next, fold the shirt in half along its length.
- On the folded edge, use a washable marker to draw the bottom half of a heart.
- Make small accordion pleats beginning at one end of the line. Follow the sketched line, folding the pleats so that the marker line is visible on top of the folds. In order to fit the line’s curve, you must make the pleats slightly shallower on the inside and slightly deeper on the outside.
- Use a wide rubber band to hold the fabric in place once it has been completely pleated. Add more rubber bands as needed to the interior or outside sections of the line after placing one on the line itself.
- Apply the dye to each section.
Ombre Dip Dye
- In a bowl of dye, soak one end of the shirt. The color will gradually rise up the fabric as it sits in the dye bath.
- The other end of the fabric can be dipped into a different color of dye if you want two colors.
Best Tie Dye Kits
If you want to use a tie dye kit for your first project, then take a look at some of our favorites. These kits are perfect for all skill levels and will help you make your first piece with no hassle.
Tulip One-Step 15-Color Kit
The Tulip One-Step Tie Dye Kit, in our opinion, is the best tie dye kit overall! It has everything you need and is quite simple to use. 15 pre-measured color powder bottles, 5 pairs of gloves, a ton of rubber bands, and instructions are all included in the kit.
Additionally, a plastic cover for the surface is included to protect your surfaces. The water-activated dye can be used to dye natural fibers like cotton, wool, and rayon from bamboo. Additionally, each color is mixable, allowing you to create a variety of hues and tones.
Meland All-In-One Tie Dye Kit
The Meland All-In-One Tie Dye Kit’s gorgeous and vibrant colors are manufactured from natural materials and provide a powerful color payoff. Even after many washings, they hold up and do not fade.
The 18 colors were inspired by the colors of the rainbow and are available in powder form. Three T-shirts and three pairs of socks are included in the kit so you can experiment with different tie dyeing methods.
This kit is ideal for all age groups and can be used for family time, craft parties, birthday celebrations, and school functions.
Rit Original Tie Dye Kit
A well-known brand of at-home dye is Rit. The tried-and-true, uncomplicated dyes are effective, colorful, and reasonably priced. You’ll receive three striking colors, six simple designs, three latex gloves, and 18 rubber bands with the Rit Original Tie Dye Kit.
This is a great option if you’re new to tie-dying or only want to dye a few items. Although it comes with enough dye to color up to six T-shirts, you can use it on almost any textile or article of clothing.
Jacquard Tie Dye Kit
For dyes and other supplies for all levels of crafters, Jacquard is a well-known brand. It should come as no surprise that the company’s tie dye kit is popular among novices. The simple bundle is quite simple to use.
The three primary colors are provided in pre-measured, water-activated dyes that you can combine to create various shades. It contains sufficient dye to color up to 15 adult-size T-shirts.
Additionally, four mixing bottles, vinyl gloves, rubber bands, soda ash color fixer, and a DVD showing various folding and tying techniques are included.
Rydowenna Tie Dye DIY Kit
The Rydowenna Tie Dye DIY Kit comes with 26 beautiful, eye-catching hues that are both environmentally safe and non-toxic. Easy squeeze vials packed with already-mixed colors are included in this convenient tie-dye kit.
T-shirts, sweatshirts, skirts, scarves, blankets, gloves, socks, and other items can all be customized with these intensely pigmented hues.
For camping, birthday parties, school functions, family reunions, slumber parties, or baby showers, the kit would make a fantastic addition to a fun group activity for children and adults.
Tomser DIY Tie Dye Kit
We recommend the Tomser DIY Tie-Dye Kit if you’re looking for environmentally friendly dyes. The 26 nontoxic, acid-free colors in the SGS-certified kit are assured to be safe for you and the environment. You will also receive 126 rubber bands, 10 gloves, two aprons, and 26 squeeze-bottle dyes.
This kit’s simple instructions make it suited for both inexperienced and seasoned tie-dyers. The colors are activated with water and a fast shake, and the bottles are properly labeled, saving you time and hassle.
Vanstek Tie Dye DIY Kit
With safe, acid-free dyes, the Vanstek 24 Colors Tie-Dye DIY Kit is a product suitable for children. It also comes with a straightforward four-step user guide and is simple to use.
This kit includes 24 vivid just-add-water dye colors, each with a distinct squeeze bottle and a label that is easy to read. It’s perfect for a family activity or sleepover and it includes ten pairs of plastic gloves, 120 rubber bands, and two tablecloths.
Honey Oak Tie Dye Kit
The dye pigments in the Honey Oak Unleash Your Creativity Tie-Dye Kit are made from natural sources. Three color packs, indigo, sunflower yellow, and turkey red, are included in the set.
The botanical plants and flowers used to create each hue come from India’s deep woods. Natural textiles like cotton pair incredibly well with the eco-friendly colors.
Pastel Tie Dye Ideas For You To Try
You now have everything you need to start tie dyeing, but what should you do first? Here are some of our favorite ideas to get you started:
- Matching Lounge Set
- Canvas Bag
- Tie Dye Jeans
- Dip Dyed Sweater
- Spiral T-Shirt
- Ombre Dip Dyed Socks
- Pastel Rainbow Sweater
- Hair Scunchies
Frequently Asked Questions
Can You Wash The Item After It’s Been Tie Dyed?
Most kits advise waiting several hours or even overnight before washing your item of clothing. The most bright colors with the least fading are produced as a result of giving the dye time to set into the fabric.
After waiting, you can wash your garment in the washing machine on cold, either alone or with other tie-dyed items to prevent bleeding. Just keep in mind that drying permanently sets the dye. Be sure to follow the directions on your kit for the best results.
Is There A Time Limit To Letting Tie Dye Soak?
It’s possible to achieve brilliant, long-lasting color by allowing dye to soak into the fabric for several hours after finishing your garments. However, if you wait more than 24 hours, the fabric may dry out and produce black blotches on your garment instead of vibrant colors.
Some kits advise covering your item in plastic wrap to avoid this and keep it damp while drying. Follow the instructions on your dye as closely as you can since they will typically provide you the ideal window of time for drying before washing.
How Long Do Tie Dye Kits Last?
Although tie-dye kits have no expiration date, the color’s intensity may lessen if you combine it with water and leave it for too long. Your tie-dye kit will last for years if you keep it stored away and unused.
Final Thoughts
There is so much you can do when it comes to pastel tie dye! It’s a fun activity that will leave you with an upcycled piece of clothing that you are sure to cherish. With this guide, you’ll be able to stand out from the crowd and rock pastel tie dye your way!

In an effort to get them to avoid excessive screen time ( and arguing! ) I turned to more creative avenues that we have all since grown to love.
I created this website in the hopes of inspiring more families out there to enjoy crafting and enjoy a shared bonding experience over it.
Please enjoy it and hopefully, you’ll find something to make that you can display proudly forever!
- Master Crochet Stitches for Cozy Creations - January 23, 2024
- Half Double Crochet Guide for Cozy Creations - January 23, 2024
- Elevate Your Space with Unique Macrame Creations - January 23, 2024