Are you looking for a fun and creative activity to engage your kids during the holiday season? Making Christmas-themed soaps can be a delightful project that combines craftiness with practicality. Not only will your children enjoy the process of creating their own unique soaps, but they will also have a fantastic time using them or giving them as personalized gifts to family and friends.
In this step-by-step guide, we will walk you through the process of making Christmas DIY kids soap. You’ll learn how to choose the right ingredients, create festive designs, and ensure the soaps are safe and suitable for children. So, gather your little ones and let’s dive into the world of soap-making, where imagination and holiday spirit come together!
Please note that adult supervision is essential throughout the entire soap-making process, as it involves working with potentially hot materials. Ensure you have all the necessary ingredients and equipment ready before starting. Let’s get started on this exciting Christmas DIY adventure!
Supplies to Make Soap
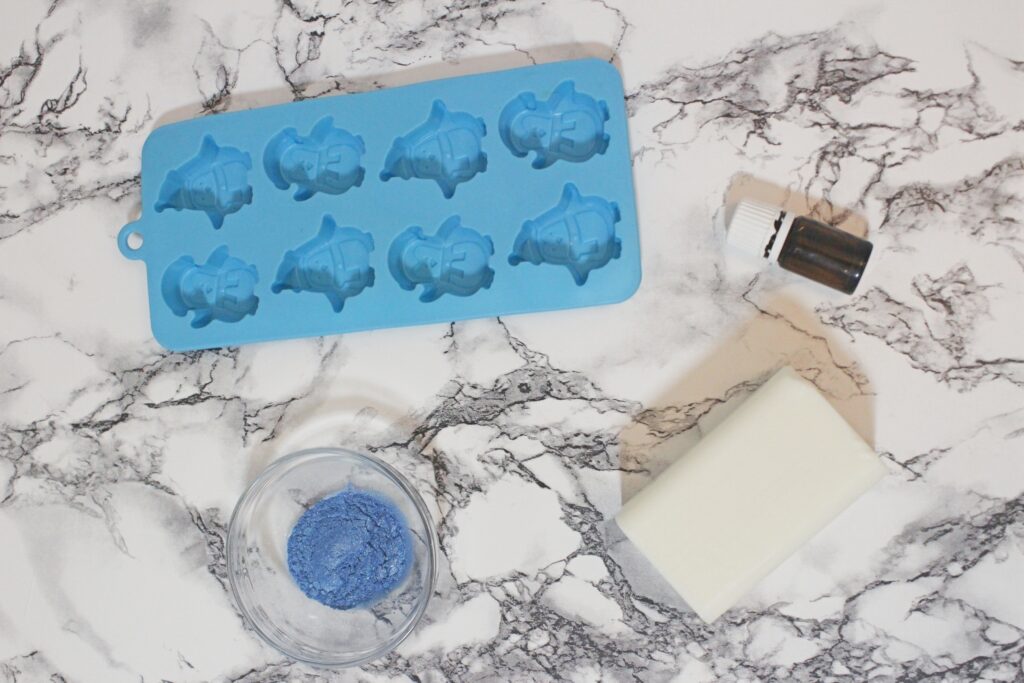
To create your Christmas DIY kids soap, you’ll need a few supplies that are easy to find and safe for children to use. Here’s a list of the items you’ll need:
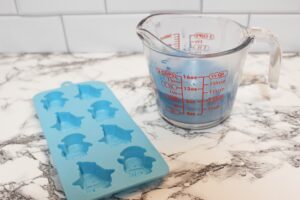
- Soap Mold: Choose a soap mold with festive shapes and designs to give your soaps a Christmas touch. There are various molds available in the market, including snowflakes, Christmas trees, gingerbread men, and more. Select molds that are suitable for children and made from safe materials like silicone or BPA-free plastic. I recommend this one from Amazon.
- 1 tablespoon Blue Mica Powder: Mica powder adds color and a touch of shimmer to your soaps. For a wintery feel, use blue mica powder. It will give your soap a cool, icy appearance reminiscent of the holiday season. Ensure that the mica powder you choose is cosmetic-grade and suitable for soap-making.
- ½ pound of Goat’s Milk Melt-and-Pour Soap Base: Melt-and-pour soap bases are perfect for kids’ soap projects as they eliminate the need for working with lye, which can be dangerous. Goat’s milk soap base is gentle on the skin and provides a creamy texture. It is readily available at craft stores or online. Make sure to get a high-quality, natural soap base without any added harsh chemicals or additives.
- 10 Drops of Lavender Essential Oil or a Calming Blend Safe for Kids: Essential oils add fragrance to your soap and can provide a calming effect. Lavender essential oil is a popular choice for its soothing properties. However, it’s essential to ensure that the essential oil you select is safe for children. Alternatively, you can choose a pre-blended calming essential oil blend specifically formulated for kids. Check for child-friendly labels and dilution guidelines.
These supplies will set you on the path to creating beautiful, fragrant, and skin-friendly Christmas DIY kids soap. Remember to double-check the safety guidelines for each ingredient, especially when working with essential oils and colorants. With these items in hand, you’re ready to move on to the exciting process of making your own festive soaps!
How to Make Soap in 7 Easy Steps
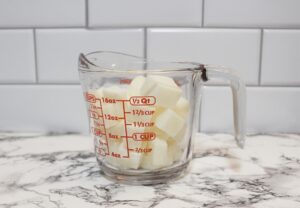
Step One: Begin by cutting up the melt-and-pour soap base into small cubes, approximately one inch in size. This will help the soap melt more evenly and quickly.
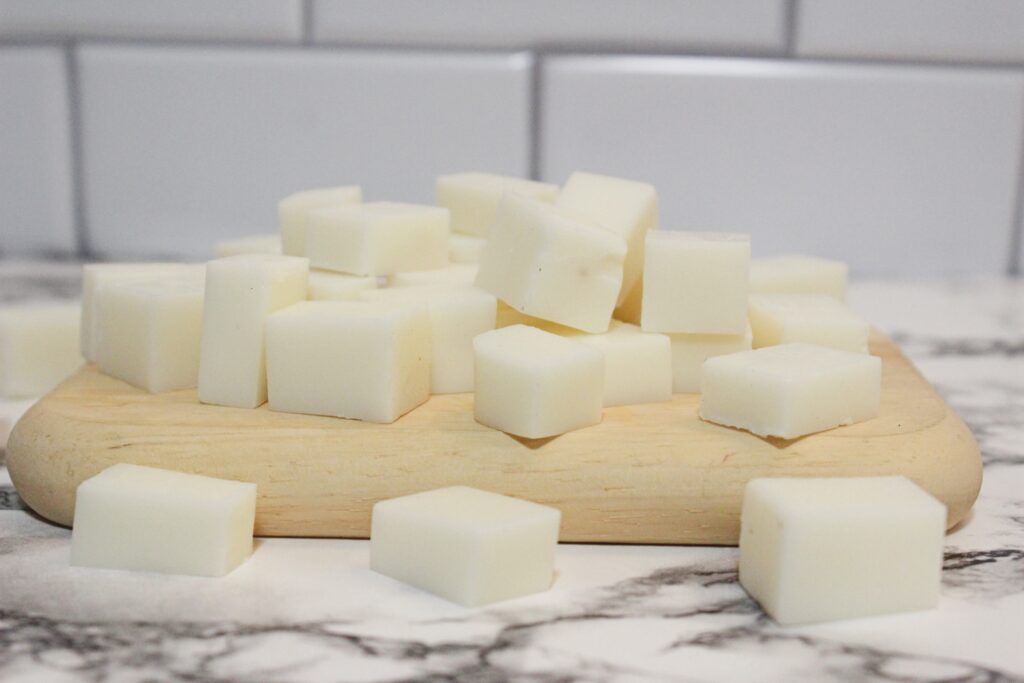
Step Two: Place the soap cubes into a microwave-safe glass container. Microwave the soap in 30-second increments, stirring in between, until the soap is completely melted. Be cautious not to overheat the soap, as it can become too hot and lose its desired consistency.

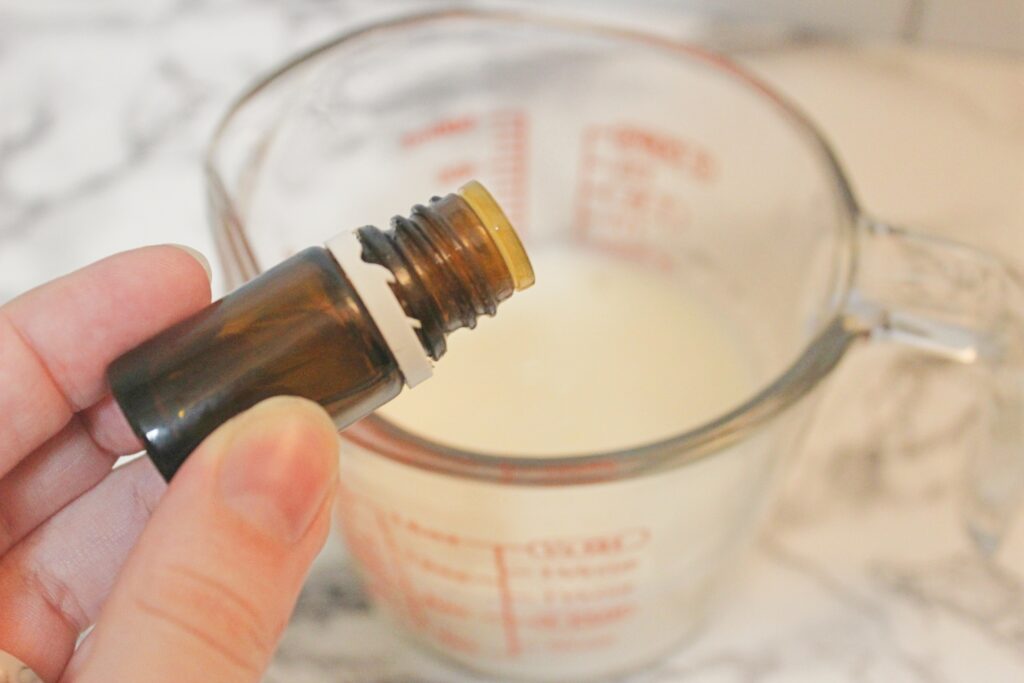
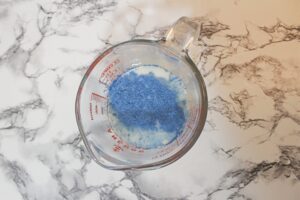
Step Three: Once the soap is melted, add 10 drops of lavender essential oil or your chosen calming essential oil blend. Stir gently to ensure the oil is evenly distributed throughout the soap base. This step will add a delightful fragrance to your soap.
Step Four: Next, add the 1 tablespoon of blue mica powder to the melted soap. Stir the mixture very well, ensuring there are no lumps or chunks of mica powder remaining. Continue stirring until the blue mica powder is fully combined with the soap base, creating a consistent color throughout.

Step Five: Carefully pour the liquid soap mixture into the soap molds. Fill each mold to the top, ensuring that the soap mixture is evenly distributed among the different shapes. Take your time and pour slowly to prevent any spills or overflow.

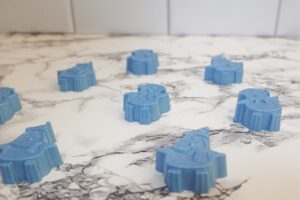
Step Six: Allow the soap molds to sit undisturbed for several hours or preferably overnight. This will give the soap enough time to cool and harden completely. The exact time required for hardening may vary depending on the room temperature and the thickness of the soap molds.

Step Seven: Once the soap has hardened, gently pop each soap out of its mold. If you’re finding it difficult to remove the soap, you can try placing the molds in the freezer for a short while, as it can help in releasing the soap easily.

DIY Christmas Soap Tips and Tricks
- Essential Oils: While lavender essential oil is a popular choice for its calming properties, feel free to experiment with other kid-safe essential oils as well. Scents like citrus, peppermint, or vanilla can add a delightful twist to your soap. Just ensure that the chosen oils are safe for children and follow proper dilution guidelines.
- Soap Molds: The soap molds you use can be tailored to your preferences and creativity. While we recommend using festive-shaped molds for a Christmas theme, you can use any mold that is safe for soap-making. Explore different designs and sizes to make your soaps unique and exciting.
- Mica Powder: Adding mica powder gives your soap a vibrant and fun color, but it is not essential to the soap-making process. If you prefer unscented or plain-colored soaps, you can omit the mica powder altogether. Feel free to experiment with natural colorants like dried herbs, clays, or even fruit and vegetable purees for a different visual effect.
- Eliminating Bubbles: If you want a smooth surface on your soap and wish to eliminate any bubbles that may form during pouring, you can spritz the surface with rubbing alcohol after pouring the soap into the molds. This helps to disperse the bubbles and create a more even appearance.
- Safety First: Always prioritize safety when involving children in soap-making. Adult supervision is crucial throughout the process. Ensure that all ingredients and equipment are safe for children’s use. Keep hot materials and melted soap away from little hands to avoid burns or accidents.
- Personalize and Decorate: Encourage your kids to get creative with their soap designs. They can add extra touches by embedding small toys, dried flowers, or colorful sprinkles into the soap molds before pouring the soap mixture. This personalization will make their soaps even more special.
- Gift Ideas: These Christmas DIY kids soaps make fantastic gifts. Encourage your children to think about who they would like to give their soaps to—family members, friends, or even teachers. They can create custom packaging by wrapping the soaps in festive tissue paper or placing them in decorative gift bags.
Remember to have fun and enjoy the process of making these Christmas DIY kids soaps. Let your creativity and imagination shine as you explore different scents, colors, and designs. With these tips and tricks, you and your kids are all set to embark on an exciting soap-making adventure!
DIY Christmas Soap How to Guide
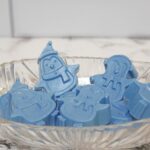
Christmas Soap for Kids
Equipment
- Soap mold
Materials
- 1 tablespoon blue mica powder
- ½ pound goat’s milk melt-and-pour soap base
- 10 drops Lavender essential oil
Instructions
- Cut up the melt and pour soap base into small cubes about one inch.

- Put the cubes of soap into a microwave-safe glass container and melt in 30-second increments until fully melted.
- Add 10 drops of lavender essential oil.

- Add in the blue mica powder and stir very well until it is all combined with no chunks.
- Pour the liquid into the soap molds.
- Let sit overnight, or for a few hours at least.

- Pop out of the soap molds when it is hardened and enjoy!
FAQ
What ingredients make soap?
1 tablespoon blue mica powder
½ pound goat’s milk melt-and-pour soap base
10 drops lavender essential oil
soap mold
How do you make soap?
1. Cut up the melt and pour soap base into small cubes about one inch.
2. Put the cubes of soap into a microwave-safe glass container and melt in 30-second increments until fully melted.
3. Add 10 drops of lavender essential oil.
4. Add in the blue mica powder and stir very well until it is all combined with no chunks.
5. Pour the liquid into the soap molds.
6. Let sit overnight, or for a few hours at least.
7. Pop out of the soap molds when it is hardened and enjoy!
Conclusion
Making Christmas DIY kids soap is a wonderful activity that combines creativity, holiday spirit, and practicality. By following this 7-step guide, you and your little ones can create beautiful, fragrant soaps that make for delightful gifts or personal treats.
Throughout the process, it’s important to prioritize safety by supervising children and using child-friendly ingredients and materials. Remember, you can choose from a variety of essential oils, soap molds, and colorants to customize your soaps and make them truly unique.
Whether you opt for lavender-scented, blue-colored soaps or explore different combinations, the end result will be a joyful and satisfying experience for both you and your children. The possibilities for personalization and creativity are endless, and the soaps can be gifted to family and friends to spread the holiday cheer.
So, gather your supplies, let your imagination soar, and enjoy the process of making Christmas DIY kids soap. The joy and pride that come from creating something with your own hands are invaluable, and these festive soaps will bring a touch of magic to the holiday season.
Have fun, be safe, and cherish the memories created during this special time of year. Happy soap-making!

In an effort to get them to avoid excessive screen time ( and arguing! ) I turned to more creative avenues that we have all since grown to love.
I created this website in the hopes of inspiring more families out there to enjoy crafting and enjoy a shared bonding experience over it.
Please enjoy it and hopefully, you’ll find something to make that you can display proudly forever!
- Master Crochet Stitches for Cozy Creations - January 23, 2024
- Half Double Crochet Guide for Cozy Creations - January 23, 2024
- Elevate Your Space with Unique Macrame Creations - January 23, 2024
