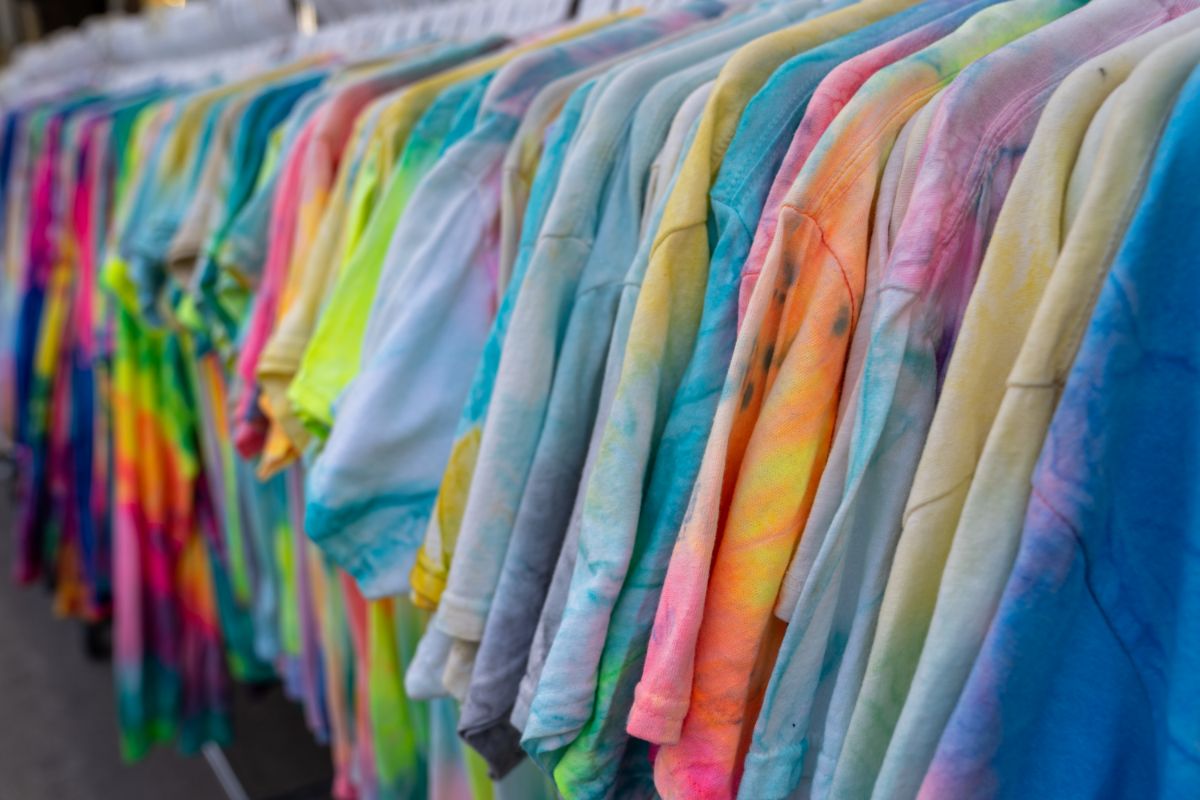
Since the 60’s when tie-dye clothing first became popular and easy to make, this style has become a symbol of both free expression and the carefree, hippie age.
Tie-dye clothing never really goes out of style thanks to its free-spirited uniqueness that it conveys through the one-of-a-kind patterns it makes.
Tie-dye is a very popular hobby in the crafting world, with people creating beautifully intricate designs on clothing or fabric. Some of them are so detailed you won’t believe that they were made using a few basic colors and some rubber bands!
You don’t need to make dye-dying complicated to make some fun and pretty designs though. One of the best things about this craft is that it’s pretty easy to do, and almost everyone including young kids can give it a go to make unique clothing.
When it comes to tie-dying clothes, you can either do it completely randomly by adding color wherever you want, or you can follow a pattern to make a specific design.
There are loads of patterns that you can find online, but here we have rounded up a list of the ones we think are the very best.
In this list, we have everything from very simple patterns, to more intricate ones like hearts, stars, and even bats!
Some of the patterns in this list make use of templates, making it much simpler to sketch the ideal shape. You can print them out in any size you want, resize them to fit the fabric or clothing you’re dyeing, and the best part is that you can download them all for free!
Keep reading to find the best pattern for your next tie-dye project!
Before You Start
While you may be very excited to jump into dying your clothes, you need to do some prep work first to make sure that the whole dyeing process goes smoothly and you get the best results at the end.
Before you try any of the designs, you need to make sure the material is damp before you try to shape it, tie it, and dye it.
Soaking it in water is fine enough, but to get the brightest colors out of the tie-dye, soak the item in soda ash for at least twenty minutes before adding the dye to it if you are using a tie-dye kit. You can buy tie-dye kits that include this on Amazon.
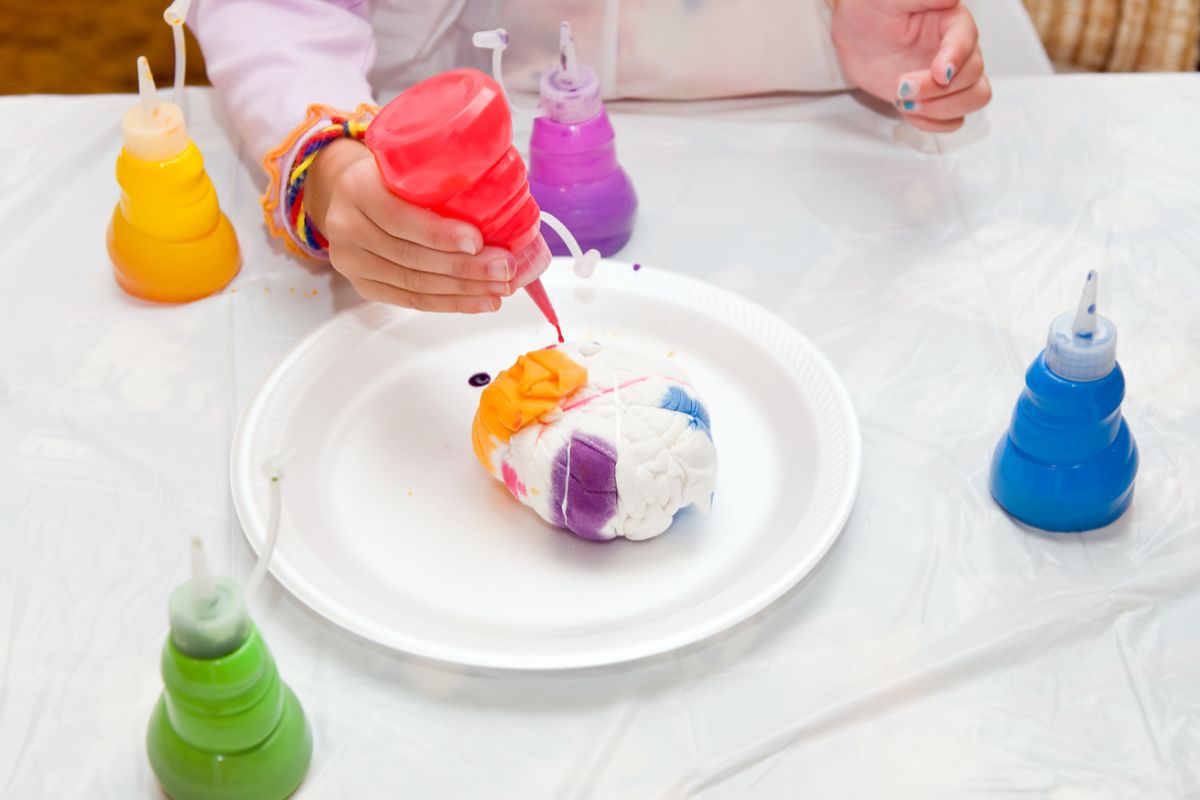
You will also need to have rubber gloves ready to protect your hands, and some rubber bands or zip ties.
These are used to fold the shirt and hold it in place, while also separating the dye colors from one another. Rubber bands work fine for this, but for the crispest lines, you should use zip ties.
Finally, make sure that your work area is prepared. You will want to cover your surface with plastic wrap, as if the dye touches the table it will, well, dye it. Unless you want to also make a multicolored table (see also “How To Make A DIY Light Table“), it’s best to cover it.
Now that all of that’s out of the way, here are some great tie-dye patterns to try!
Traditional Patterns For Tie Dye
This collection of tie-dye patterns is considered to be more traditional and classic. If you did tie-dye as a kid then you probably ended up making one of these patterns because they are so easy to do.
If you intend to use traditional dyes for any of these designs, we recommended that you purchase a tie-dye kit that includes soda ash and then soak the clothing in the soda ash solution after tying them up.
If you buy a kit similar to this one, soda ash is already included in the package, but you may also get it independently on Amazon.
Here are some classic patterns to try.
Spiral Pattern
This design is probably the one you will always think of when someone mentions “tie-dye”. It can be found on both vintage tie-dye clothing and newer pieces made today because it is so easy to create.
You may make this design in any color you like, or you can do it in a rainbow pattern using three different colors.
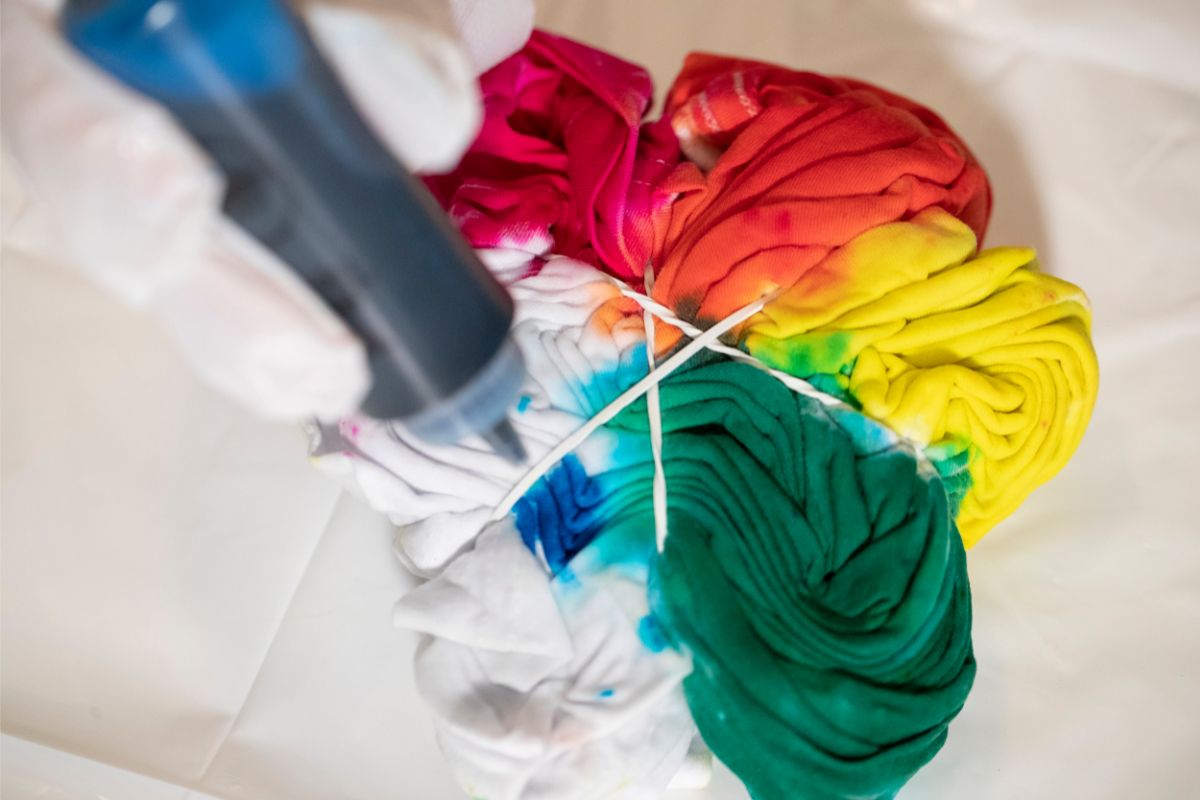
To make this design, pinch and twist the center of the shirt when it is laid flat on the surface. The trick is to maintain a tight twist and assist the folds in coming together to form a more perfect spiral. After that, secure it using elastic bands or zip ties at regular intervals.
To create a rainbow, color the portions that are opposite each other with yellow. After that, color the following areas red, and after that, color the following sections blue. To assist in the blending of the colors, squeeze them close to the rubber bands.
Scrunch/Crumplel Design
This technique is often referred to as scrunch tie dye or crumple tie dye (see also “How To Make Reverse Tie Dye“). It’s easy enough to understand, and is the one that most people go for if they want a more random look as you never really know how it’s going to work out!
This is the best pattern to try if doing this craft with children, as it doesn’t have to follow any sort of plan.
Simply scrunch the clothing into a ball, and then wrap it in a haphazard manner using rubber bands or zip ties. After that, place the dye in any location that you choose.
Rainbow Bullseye
Grab the center of the shirt with one hand and lift it, gathering the remainder of the garment as you go. After that, fasten it using elastic bands, being sure to space them out properly.
Apply a different color dye to each section in the order of the rainbow. First use red, then yellow, and finally blue. Make sure to squeeze the colors where the rubber bands are so that they can more easily merge.
Corner Bullseye
There are some similarities between this one and the rainbow bullseye. Instead of pinching the shirt in the middle, you should pinch it in one of the corners.
You can use just one color or a variety of different tones of the same color, which can create a nice gradient effect in the garment.
Multi-Target
You may create a multi-target pattern by doing multiple bullseye tie dye designs (see also “DIY Tie Dye Sweatshirt“), which is an extension of the typical bullseye tie dye designs seen above. To tie off the various pieces of the garment, pinch them together. After that, you can color it however you like.
Alternating Stripes
Start by folding the shirt in the accordion fashion. An accordion fold is a way to fold anything that uses a series of alternating folds to make several panels that are all about the same size.
So you fold once forward, then once back, then forward again, etc. Because the alternating folds make parallel pleats that look like the middle part of an accordion, this fold is called an “accordion fold.”
After folding the clothes, apply rubber bands at regular intervals of 1-2 inches, making sure they are evenly spaced apart. You may achieve a variety of color combinations by alternating the dye colors.
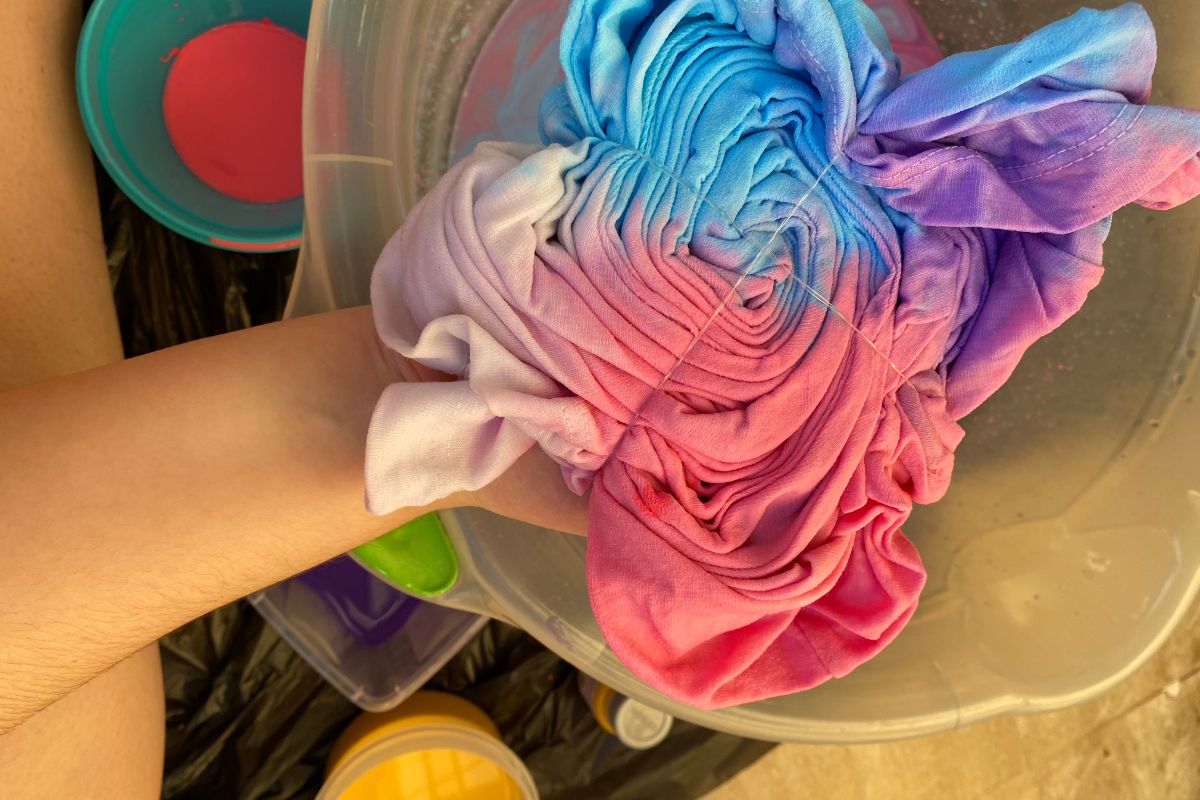
Rainbow Stripes
After accordion folding your item and wrapping rubber bands around it in even parts, proceed in the same manner as you did with the alternating stripes.
However, when you dye it, use red, yellow, and blue (or any other colors you want) in an alternating fashion to achieve the desired effect. Put some pressure on the dye bottle and run it over the edges of the rubber bands to help merge the colors.
Diagonal Stripes
Start folding the shirt at an angle rather than in a straight line because this is how to change the direction of the line.
Rubber bands or zip ties spaced at around 1–2 inches apart can be used to wrap it. Then you may dye it in any colors you like, or you can just use one color to keep some of the white of the shirt showing through.
Weird And Wacky Designs To Try
If you want to be even more unique with your tie-dye clothing, then you should give some of these patterns a go.
These patterns are a bit more difficult to construct or call for a couple of additional stages, so they might be a bit too difficult for a complete beginner to try. If this is you then maybe do some practicing first.
You may make the process of drawing the designs simpler by downloading the free templates and using them as guides.
In the same way that you would for the traditional patterns, we suggest utilizing a tie-dye kit that includes soda ash and then soaking the items in the mixture after you have tied them. Here are a few fun patterns to try.
Heart Pattern
Fold the shirt in half and use a washable marker to draw a heart on it. This will create a lovely tie-dye heart. To make things simpler, you can use this free heart template that you can download, print, and use.
After that, fold along the outline while twisting the garment to ensure that the marker remains aligned.
Make sure the shirt stays in place along the line by securing it with a zip tie. After that, pull the remaining portion of the shirt to one side and wrap zip ties approximately one to two inches apart.
To create a pattern that looks like a rainbow, alternate between different colors.
Circle Bursts
Start by folding the garment using the accordion fold method. After that, pinch and pull the top corner, and then add a rubber band or zip tie to hold it in place.
Then, repeat the process while moving a few inches down across the top. Do the same along the top edge. Repeat this along the perimeter of the bottom, but this time insert the rubber bands between the rubber bands on the top.
Because some of these require more support when being secured, we advise using reusable zip ties rather than rubber bands for this design as they have better grip.
Star Pattern
Fold the shirt in half and use a washable marker to sketch half of a star on each side of the fold. This will create a lovely tie-dye star.
Even for a skilled artist, drawing a start is pretty difficult. To make it easier for you, here’s a free downloadable pattern for a star that you can download, print out, and then draw around.
After doing this, fold the shirt over while keeping one finger in the center of the fold along it. Do this so that the top point aligns with the middle of the following point. The shirt should then be folded in reverse along this line.
Repeat the procedure of aligning the star’s points until the entire structure is folded and all of the marker lines are aligned with one another.
After folding it following the line that the marker drew, fasten it with a zip tie. Then, pull the remaining portion of the shirt to one side and wrap zip ties approximately one to two inches apart.
You can use any color you wish to dye each part. The initial segment will function as the primary central star.
Ghost Pattern
Whether you want a fun shirt for Halloween or you just love all things scary, this is a great pattern to try out.
Fold the shirt in half, then using the printable template, half of a ghost should be drawn with a washable marker to create a ghost design.
Either sew along the design or fold along the line, being careful to keep the line straight as you do so. Put a rubber band around the ghost’s eye and tie it off. Use zip ties spaced approximately 2 inches apart to secure the remaining portion of the shirt.
The eye should be dyed black, while the rest should remain white for the ghost. After that, dye each area a different color to achieve the look of alternating stripes.
Pumpkin Pattern
To begin the pumpkin pattern, fold the shirt in half, and then use the printable template to sketch the top half of the pumpkin.
Stitch along the design while carefully pulling the threads to create the folds. After that, crumple up the remaining portion of the shirt and fasten it using zip ties. Color the piece of the pumpkin orange, the stem green, and the remaining area black.
Bat Pattern
To produce a spooky bat design, you must first fold the shirt in half and use a washable marker to draw one half of a bat on the folded surface of the shirt using a free printable pattern.
This pattern takes a bit more effort as it requires a little sewing to get the design perfect. Stitch along the pattern, then gently pull the threads to tighten. After that, secure it with zip ties.
The remaining portion of the shirt should then be balled up and secured using rubber bands or zip ties. Cover it with whatever color dye you want, but black might be perfect to go with the scary theme.
Candy Corn Patten
You can create a candy corn pattern to use for another design with a fall or Halloween theme.
Begin with a shirt that has been folded in half. Use a washable marker to draw a shape of a triangle with two halves, or use the downloadable template instead.
After that, fold it along the outer line, and use a rubber band to keep it in place. Place zip ties or bands around the rest of the shirt in an even distribution across the width.
To color it, leave the top part of the candy undyed and white, then color the portion below it yellow, and finally color the piece below that orange. Make a point of using the lines as a reference. To finish, give the remaining portion of the shirt a complete black dye job.
Other Ways To Dye Clothes
While the above patterns all follow the typical way of dying clothes, the best thing about this kind of craft is that there are loads of other weird ways to dye and customize your clothing. Here is another fun way to try dyeing an old shirt.
The Ice Way
The ice tie dye method is a one-of-a-kind approach to dyeing clothing. While you make the design in a typical way, the dye is added oddly.
To follow this method, place the garment on a drying rack or on top of several containers and place the whole thing inside a tray. After that, place ice on top of it.
Then, rather than mixing the dye, you are going to sprinkle the dry powder over the ice. It takes several hours or perhaps even days for the ice to melt completely, but during that time it mixes to create a beautiful marble look.
Summary
These have been some of the best patterns to try out when dying your clothing. Give some a go the next time you want to have some fun with tie dye (see also “Valentine’s Day Tie Dye Craft“)!

In an effort to get them to avoid excessive screen time ( and arguing! ) I turned to more creative avenues that we have all since grown to love.
I created this website in the hopes of inspiring more families out there to enjoy crafting and enjoy a shared bonding experience over it.
Please enjoy it and hopefully, you’ll find something to make that you can display proudly forever!
- Master Crochet Stitches for Cozy Creations - January 23, 2024
- Half Double Crochet Guide for Cozy Creations - January 23, 2024
- Elevate Your Space with Unique Macrame Creations - January 23, 2024
